
Recording your demonstrations is especially important for projects involving people from all over the world. Furthermore, if you go the cross-platform road like with Xamarin, you are most probably both iOS and Android applications at the same time.
Commercial solutions
There are various excellent commercial solutions for that like Camtasia Studio which offers amazing recording and editing features. As much as I like this tool and can only recommend it, there are times you just need as free solution for recording and leave editing aside.
The setup
This post assumes that you are demoing an application running on an physical iPhone and a physical Android device and that you are using a MacOS computer to project and record your demonstration.
If you are on Windows or Mac just demoing an Android phone, most of the content of this post still applies, just skip the iOS part.
If you are on Windows and want to display and record your iPhone application, there are no free solutions in my knowledge to do that. Feel free to update me in the comments below if you know any.
Projecting an iPhone
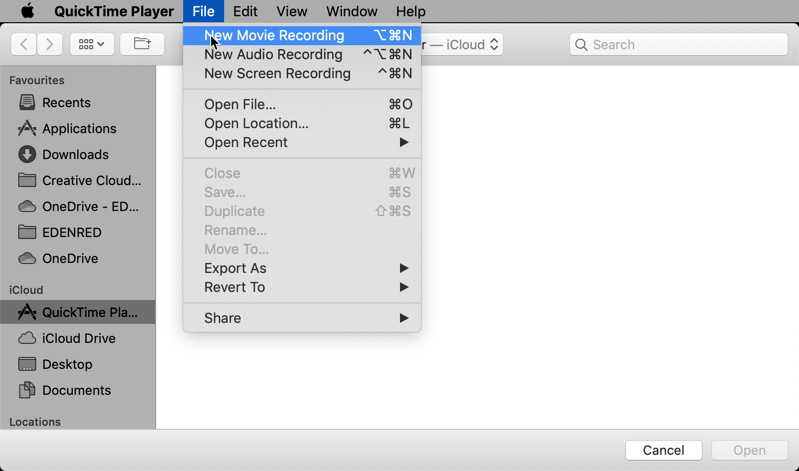
MacOS has a built-in but hidden way to allow you to record your computer screen : Quicktime. It can also be used to display the iPhone connected to your computer. The problem is that it cannot do both at the same time. So we will use it to display the iPhone.
After opening Quicktime, in the menu, select the New Movie Recording option as in the screenshot below.
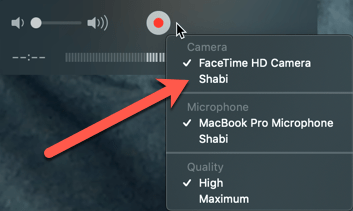
Then, changing the video source by choosing the device’s name is needed as shown below.
Projecting an Android device
There are various pieces of software that can be used again here. Most of them are paid or free with advertisements like Vysor. There is a completely free and opensource alternative however : scrpcpy.
Instructions on how to install it or how to use it can be found there : https://github.com/Genymobile/scrcpy.
Once it is done, displaying an Android phone on screen is as easy as plugin the phone to the computer and running the following command.
scrcpy
Recording tool
To record the screen we will use the Open Broadcaster Software https://obsproject.com/.
At the time I am writing these lines there are still some minor tweaks needed to make OBS function correctly on MacOS Catalina. More informations here : https://obsproject.com/forum/threads/macos-10-15-catalina-support-status.111343/
First launch of OBS
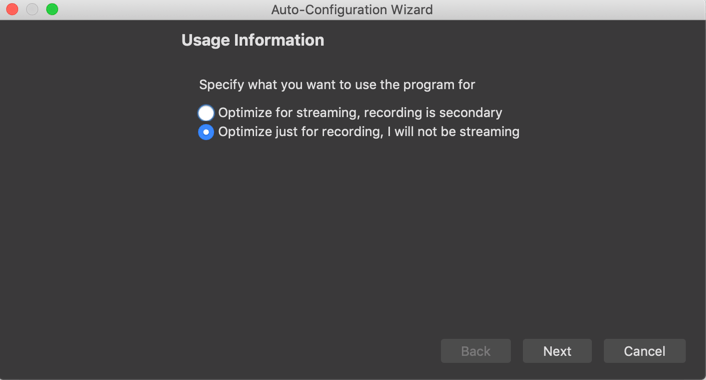
When you launch OBS for the first time on a machine the auto-configuration wizard is displayed. If you are new to OBS you might want to follow the wizard according to the screenshots below.
Optimize for recording :
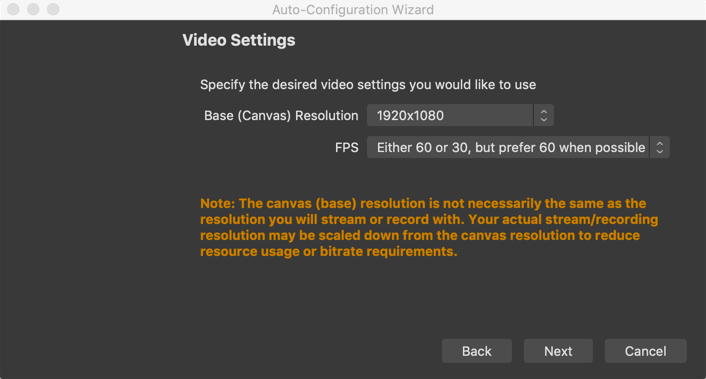
Set the canvas resolution do 1920x1280 :
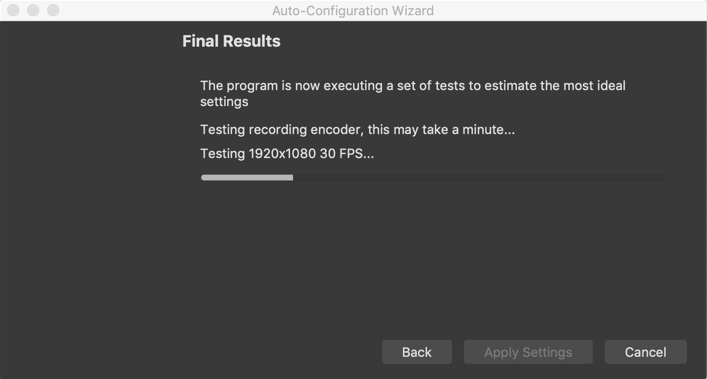
Wait for the process check if the configuration chosen is possible with your current hardware :
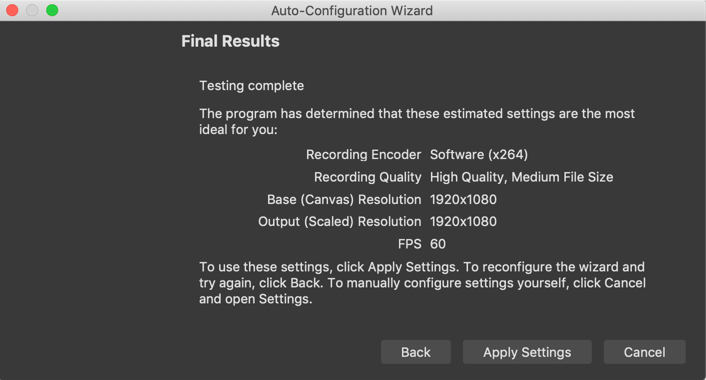
Displaying a summary of the configuration applied by the wizard :
Configuring the first scene
OBS has the concept of a scene. This is link your working video canvas. You can add many video and audio input to one scene. You can also configure several scenes at switch between them applying the kind of effects seen during live streaming videos.
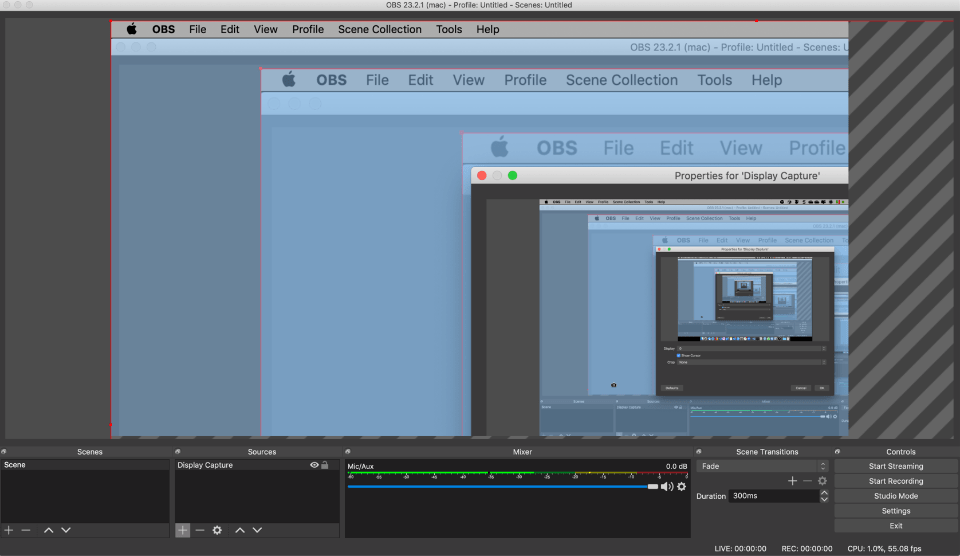
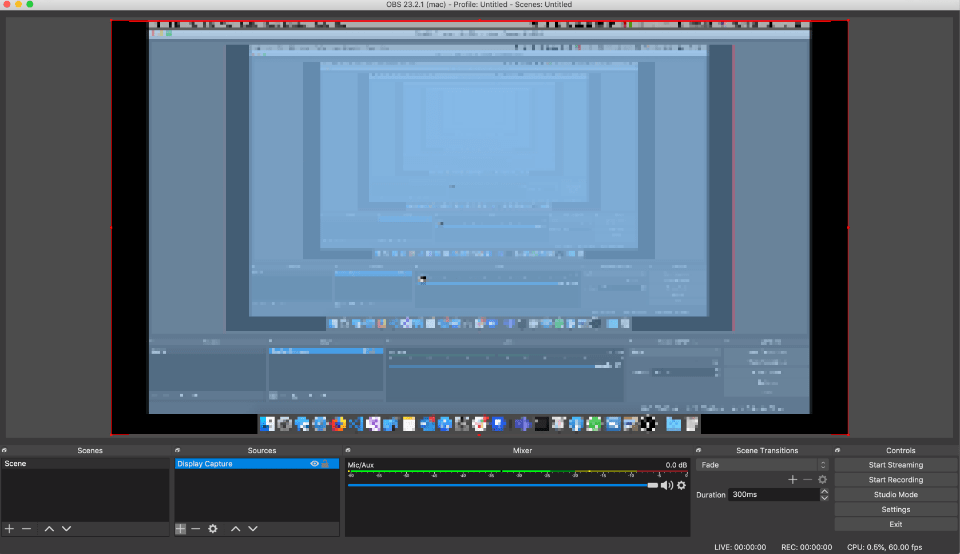
When you first launch OBS, the scene by default is your current monitor. Which gives something recursive like the following picture.
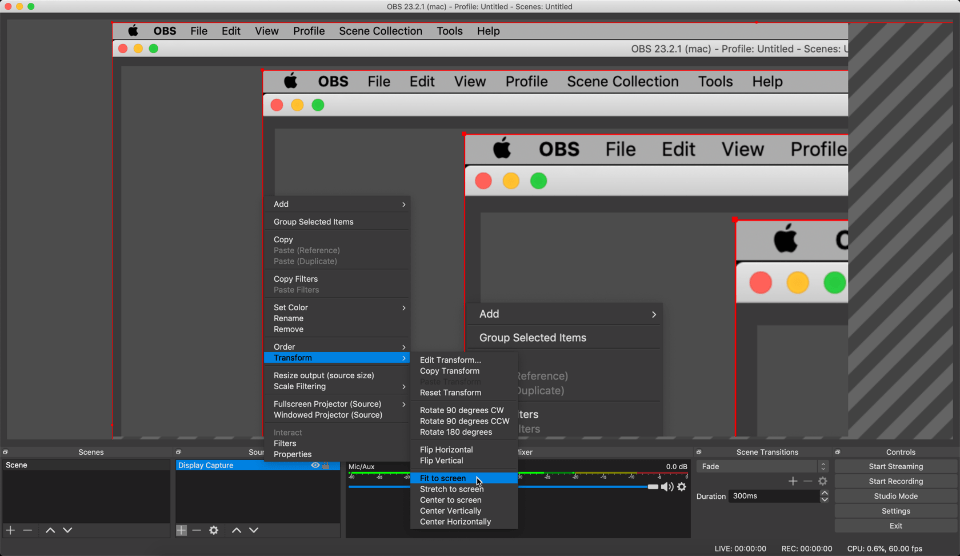
On MacOS, the display seems to be only recording a quarter of the screen. Nothing to worry, we just need to center and fit the screen in the scene by right clicking on the Display Capture and selecting Fit screen under the Transform menu.
Configure the recording settings
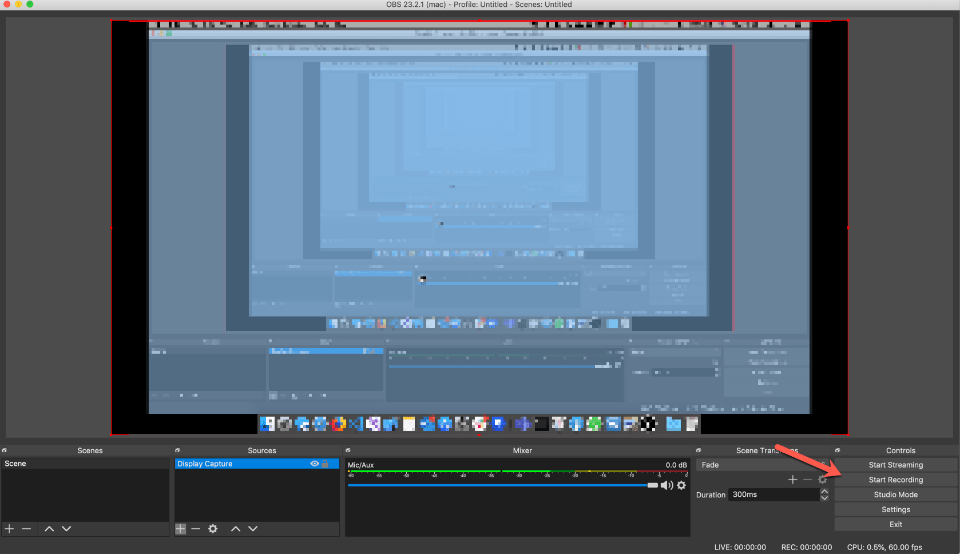
Before pushing the Start Recording button on the bottom right of the OBS interface we need to check the recording settings.
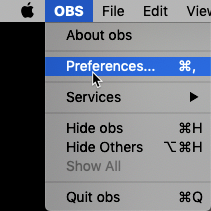
We can tune these by opening the OBS settings :
In the output section check the output path and the recording format.
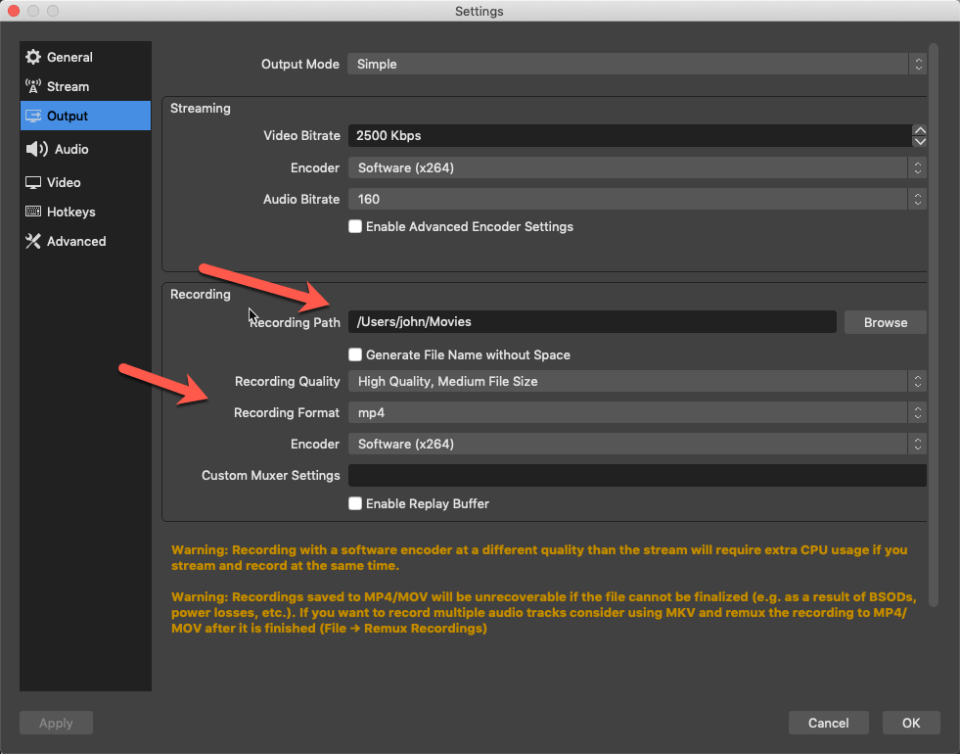
By default the mkv file format is selected. It has many advantages but needs to be transformed after capture to edit or publish it. In my settings, since I will edit the videos after with Camtasia Studio, I choose mp4.
Recording
If recording your screen is actually enough for you, you can actually stop reading this post. Just display your iPhone and your Android devices and push the Start Recording button on the bottom right of the OBS interface and retrieve the record in the folder you have chosen.
Going further
Still there ?
…
Yes ?
…
Let’s go a bit further !
Instead of recording the whole screen we will only configure one scene with the iPhone on the left, the Android on the right an and on the middle a webcam of you presenting to makes things a bit more lively.
Capturing a device window
- Launch Quicktime and scrcpy to display you iPhone and Android devices somewhere in your screen.
- Either delete the Display Capture of the current scene under sources or create a new scene to have a clean scene.
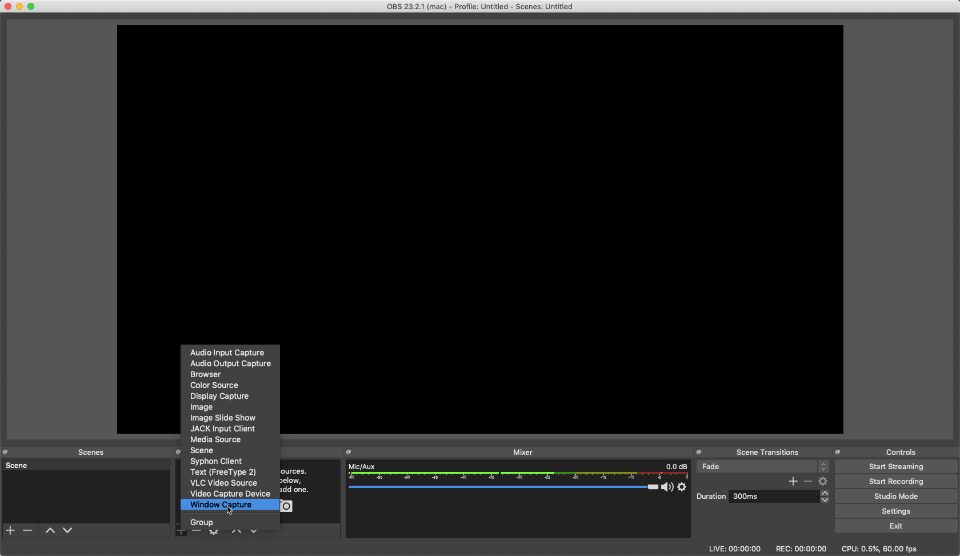
- Add a new source by click on the “+”.
- Select Window Capture.
- Give it a name like Android Capture or iPhone capture.
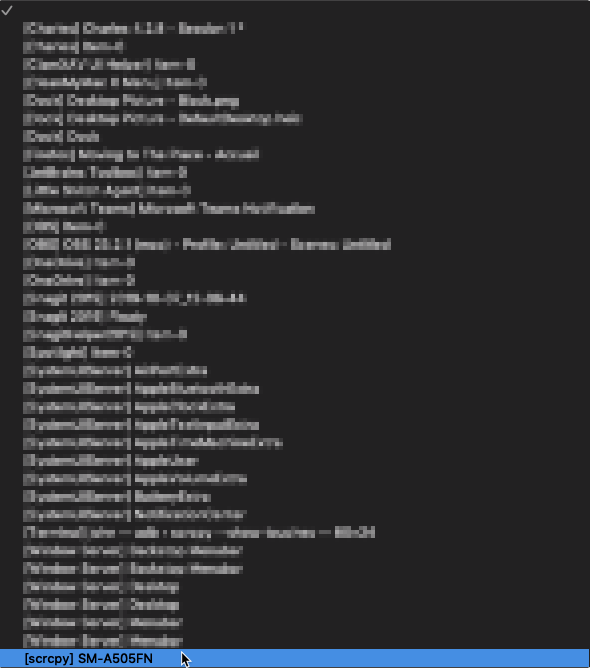
- Locate the windows you want to capture (the name of the program is between square brackets).
Have you read the steps above before looking at these images ?

Do not forget to repeat the process for the other device.
Capturing a webcam
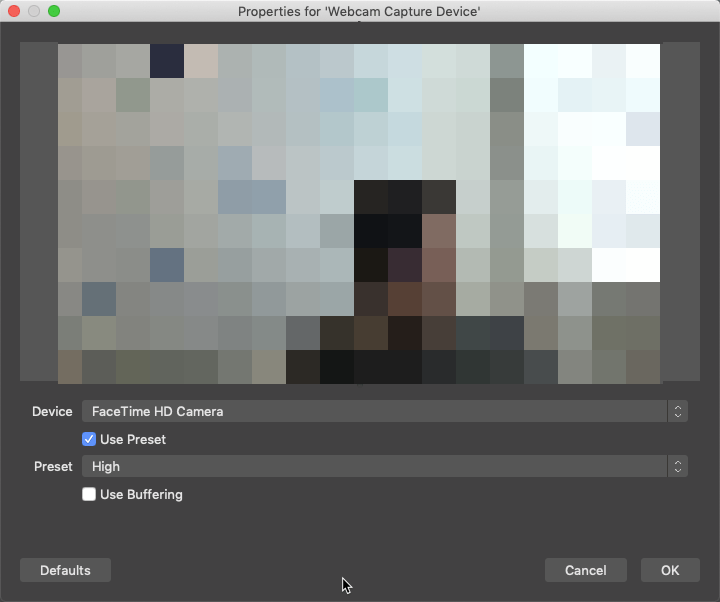
Capturing a webcam is the same process as before but instead of selecting the Window Capture option select the Video Capture Device, give it a name and choose your webcam in the list.
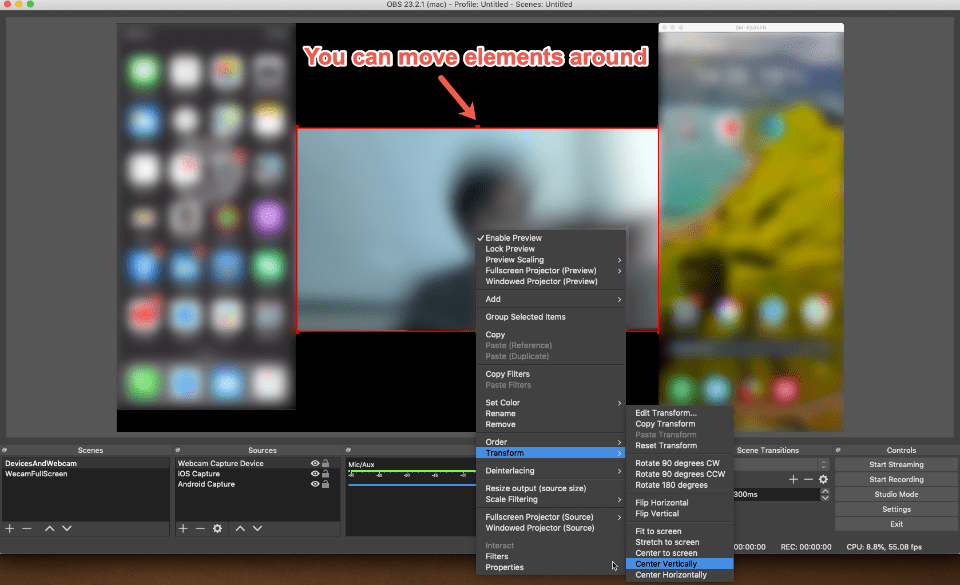
Arranging the scene
You can move your sources around, scale them like in any photo/video editing software. You can also access more features by right clicking on each source like for centering the webcam source here.
And once you are happy with the results like I was you can start recording !

Conclusion
Recording a demo is not something very simple, beyond just the software you need the right hardware like a proper microphone, a room without noise etc…
After recording you will often need some sound processing (noise and glitch removal) or video editing and so one.
OBS Studio have far more capabilities than what demonstrated here, especially live streamings. I hope that by reading this post you got a glance of what is possible with it.
If you liked this subscribe to the channel and do not forget to ring that bell to receive notifications for… oops sorry, this is not Youtube.
As always, please feel free to read my previous posts and to comment below, I will be more than happy to answer.
Comments