In the fast-paced world of mobile app development, staying competitive and up-to-date with the latest technologies is crucial. However, migrating a mobile application from Xamarin to Flutter is no small task, especially when dealing with a substantial app with over 100 screens, a presence in more than 12 countries, and a user base of over 3 million people. In this blog post, we will dive into the human aspects of this migration journey, focusing on the challenges and successes that come with it.
If you are interested about the technical aspects or the reasons why we did it of this migration, you can read more about this in the tale of the tech side.
The decision to rewrite the application was not made lightly. It was part of a plan made for all applications in the company. Our application, was the third to embark on the Flutter journey.
The first step was to create a detailed migration plan that addressed not only the technical aspects but also the human factors. It was clear from the start that this was not going to be a quick and easy transition. The initial estimates suggested it would take more than six months to complete.
We decided early on that we would train the existing Xamarin developer team to Flutter and that they would be the ones working on the migration. Indeed, when a team has been working on an app for 4 years, the actual asset is not the code, but their knowledge of the product. Even more so when code is the documentation.
Everyone had the option to either switch to Flutter or remain in .NET and join different teams for backend development.
One of the key objectives was to finish the migration as soon as possible while retaining the ability to make modifications in Xamarin for a certain period. This approach was taken to minimise disruptions and allow for a gradual transition. The strategy, however, presented its own set of challenges, mainly delays.
One of the challenges faced during the migration was the initial skepticism from the team. Many developers felt less productive with Flutter compared to Xamarin for quite some time, which is understandable when transitioning to a new framework. Change can be challenging, and learning Flutter was harder than expected.
We assured the team about our understanding of this situation and that things would improve as we became more familiar with it.
With more than ten developers split into two squads, it was essential to get everyone up to speed with Flutter and to familiarise themselves with this technology that was new to most. Learning a new framework takes time, and it is not always smooth sailing but we were convinced that the best way of learning anything is actually doing it.
The teams were given the ability to spend a development sprint to experiment with Flutter and build their knowledge.
In addition to this, a trainer was brought in after that sprint, and a customised training program was designed to facilitate a smoother transition.
Several developers faced unexpected difficulties when learning Flutter’s development approach. Switching to a completely different framework understandably takes time and difficulties can happen any time during the development especially since we work on complex features.
We were confident the squads would adapt quickly, but it turned out to be more challenging than expected.
Acknowledging these challenges and offering support is crucial in such migrations.
The migration did not go as smoothly as expected. The squads found themselves spending more time working on Xamarin than originally anticipated. Even though it was necessary to ensure that essential updates and fixes could still be made to the existing application, it caused noticeable delays.
We had to temporarily hire a squad of experienced developers to address the delays. Given the application’s complexity and the time required to get new developers up to speed, this hiring would only yield benefits if they stayed with us for a couple of months. This choice was made in coordination with the business team when it became evident that the advantages outweighed the associated costs.
Despite their experience in Flutter, this team help was limited to their understanding of our industry, confirming the initial assumption that the team is the asset.
Migrating a mobile application from Xamarin to Flutter is a complex process that involves not just technical challenges but also significant human aspects. It was a transformation that required adaptability and commitment from the developer team.
Managing a large-scale migration like this also requires careful planning, continuous training, and patience.
While the initial skepticism to Flutter and the unforeseen delays posed challenges, the team eventually embraced the new technology and overcame obstacles through dedicated training and perseverance.
This migration highlights the importance of acknowledging and addressing the human factors involved in such transitions, and how these factors can ultimately influence the success of the project.
The team successfully accomplished a challenging task by rewriting a complex, finance-oriented application with over 100 screens that was more than 4 years old in just about 7 months. They switched to Flutter and followed strict development standards. Their Flutter skills now match their previous expertise in Xamarin. As the team continues to learn and improve with Flutter, they will tackle more challenges and gain valuable skills for their future projects, in addition to creating an excellent application.
If I had to undergo a similar migration in the future, would I take a different approach? Probably yes, and I would ensure that everyone knows about the Kübler-Ross’s grief cycle in order to better accompany the change. Additionally, I would certainly give stronger consideration to bringing in an additional team early on to either maintain the old app or initiate the new one but ultimately this comes down to budget considerations.
For sure something I would do the same way is trusting the existing team.
]]>Five years ago, we went with Xamarin native and the MVVM approach. It delivered solid performance but meant we had to build the UI separately for iOS and Android.
We tackled challenging tasks like integrating maps and enabling mobile payments via QR codes or NFC with Google Pay, Apple Pay, and our custom Android wallet.
We also had to adapt our app to suit local features, some activated, some not, and some varying by country.
Looking back, this choice was a winner, letting us bring our app to over 3 million users in more than 12 countries in Europe, South America, and Asia, all while reusing as much code as possible.
If you are interested about the human aspects of this migration, you can read more about this in navigating the human aspects.
A mobile app’s codebase typically remains viable for around 3 to 4 years.
Over time, it becomes more challenging to maintain, as past decisions may no longer align with current development practices and technologies.
Business requirements also evolve to stay competitive in the market, rendering some features obsolete and requiring new ones that are difficult to implement within the existing application.
Additionally, the human factor plays a role, as developers may seek to switch projects or tech stacks, necessitating the integration of new team members. Dealing with decisions made years ago is generally not enjoyable for most developers.
In 2021, we faced the following challenges:
Betting our future on MAUI seemed unreasonable due to the uncertainties surrounding it.
While rewriting the app natively was a possibility, it didn’t align with our approach to mobile app development.
We aimed to maintain visual consistency across platforms and keep feature releases synchronized. Kotlin Multiplatform mobile was another option, but it closely mirrored our Xamarin approach, making it challenging to see significant delivery speed benefits.
React Native was quickly discarded due to its use of JavaScript and subpar performance on some of our target devices.
However, in May 2021, Google introduced Flutter 2, providing an ideal solution:
With Flutter as our top choice, I faced with two challenges: learning Flutter and determining our app’s architecture.
The goal of this phase was to ensure a smooth transition of our development teams would be possible.
Learning Dart was really straightforward. It is really close to C# or Java in its syntax.
We could even copy and paste some of our C# code into Dart with minor adjustments, such as renaming Task
to Future
.
The lack of Linq
wasn’t a showstopper, as we were already using the method syntax.
In Dart, every class can be extended or implemented which proved highly beneficial when writing unit tests, eliminating the need to declare empty interfaces solely for mocking classes.
Learning Flutter was a tougher challenge. Transitioning from UIKit or Android XML, which are stateful and follow traditional UI frameworks, to a purely reactive approach was difficult.
I had to rewire my brain, and every task took me some time. Surprisingly, it took less time than accomplishing the same tasks in Xamarin.
Imagine this! As a highly experienced Xamarin Native developer, struggling to replicate some of our screens in Flutter turned out to be faster than doing it in Xamarin.
After about a week of experimenting with Flutter, I was satisfied enough with the results to present it to my management.
In Xamarin, the decision was straightforward – MVVM or nothing. There weren’t significantly divergent approaches to state management.
It traces back to XAML, initially introduced with WPF, which then extended to Silverlight, Windows Phone, and Xamarin Forms. The entire .NET mobile community just used MVVM.
However, when it comes to Flutter, state management offers a diverse array of options, including GetX, Bloc, Provider, Redux, and more. With so many choices available, it became essential to make a decision that would hold for at least the next four years.
So, I spent days on YouTube, Pluralsight, and reading articles to find a solution that met the following criteria:
After all that research and exchanges with another mobile architect we brought in the company for another mobile application, we found the Bloc package, with a focus on using Cubits, to be the best choice.
In our applications we ended up following the Clean Architecture approach.
Layer | Function | Comment |
---|---|---|
View | Generates the UI. Listens to Cubit events and invokes Cubit methods. | Rely on BlocBuilder and BlocListener. |
Cubit | Invokes one or multiple use cases to generate view states. | Maintains view state and mutates it. |
UseCase | Represent an action or process that provides aggregated data for the view. | Pure, stateless. |
Repository | Handles the data of a particular model. It chooses where it should get its data from but delegates that to DataSources or Services. | Returns aggregates in DDD terms. |
Service | A service is a technical repository. | Retrieves non-business model data or infrastructure data such as authentication tokens or phone languages. |
DataSource | Retrieves a specific model from a specific source. | For exemple calling an API or calling a local database or parsing a local file. |
After doing a real proof of concept, the development of the application started. And even though globally everything went well I want to share you you some problems we had. Most of those issues will get their own dedicated post.
In Flutter, it’s easy for developers to add plugins from pub.dev
, so it’s crucial to review and select the right ones to avoid an excessive number of plugins or unmaintained ones that could disrupt Flutter upgrades.
In the Flutter ecosystem, certain mobile service-related plugins, like those for maps, geolocation, or push notifications, often assume the use of Google services or Firebase, even on iOS.
To accommodate Google mobile services, Huawei mobile services and iOS, we had to reimplement some of these plugins to ensure our app functions seamlessly for all our users.
In advanced applications, using native plugins to access the native layer is often necessary. While some providers offer their own plugins, others require custom development.
Creating such a plugin is generally manageable, but certain cases, like one we encountered, may present challenges.
For instance, we had to create a native object cache within the plugin’s native code to maintain object references consistently, ensuring smooth communication between the Flutter and the native code.
Using platform channels for invoking native functions from Flutter and event channels for listening to native events is straightforward. However, invoking Flutter code from Native code directly can be quite challenging to execute correctly. Make sure it’s necessary before attempting it.
Migrating an application involves moving both the user and their data to a new version. In the past, we used SQLite and Xamarin.Essentials secure storage to store the user data. In our transition to Flutter, we adopted other tools for application caching and sensitive data storing.
Since encryption methods differed, we had to create custom code to transfer the data from Xamarin to Flutter. This presented challenges, partly because of Flutter’s unique application lifecycle.
Creating private plugin repositories in Flutter can be challenging. There is no official equivalent to pub.dev
. Typically, you’ll depend on git submodules or reference plugins using their git repository uri in your pubspec.yaml
.
In our case, we are using Azure Devops to host our code and build our application.
We faced problems when trying to access repositories external to the organization hosting the mobile app’s code in our build pipeline and solving those was not easy.
Along with learning a new technology, comes the first mistakes in terms of performance.
Mastering which widget gets rebuilt and when is super important to ensure a great app. Avoid mixing calls to setState
with BlocBuilder
and ensure you place those at the lowest possible level in the widget tree.
Another thing is to understand what is a Future
and how they function. As .NET developers, we had some wrong assumptions about those.
After nine months of rewriting the application, we initially published it to a limited user group and encountered unexpected issues, which we promptly addressed. This process was repeated a few times until we finally released it to all users.
In summary, I have no regrets about the technical choices we made and would choose the same path again. Our development, debugging, and release processes have become faster, and we appreciate that the tool no longer hinders our productivity, as was sometimes the case with Xamarin.
If you have a customer-facing Xamarin application, I recommend making similar choices as we did. However, there are some human-related aspects I would handle differently and that’s the topic of the following post: navigating the human aspects.
]]>This article is the second of a series of 4 articles:
In the previous article, we have seen what we need to prepare ourselves to bind a library.
Now, I will explain some key concepts and then showcase the common errors you might encounter.
For this article, I also suppose you have some basic knowledge of the binding process as written in the official documentation.
The purpose of this article is not replacing any online documentation (links at the end) but more how to deal with common errors.
A Xamarin Android binding project is structured in the following way:
Beside the actual library you are trying to bind, the most important file is the Metadata.xml
file.
This is were most of the magic happens. Most of the time, you will not touch the other files. That is why it is going to be my focus here.
I suppose that you know about the dependencies needed for your library, if not, please read the preparation part of this series.
You have basically three ways to handle native dependencies in a binding project:
For the first two, I invite you to read the official documentation about binding a jar and binding an aar.
The last one is more useful for big libraries like the AndroidX libraries, the Huawei Mobile Services or any library with a dependency on an existing one.
For example, if the library you need to bind has a reference to OkHttp, it’s not useful to create the binding for OkHttp as it already exists. Just reference the NuGet in your binding project and you are covered.
We now have an empty project and have added the jar or aar file we need to bind.
We compile the project then we can have compilation errors and warnings.
So here what I usually do next:
The little game of binding creation will be to loop between 1 and 6 until we finally reach step 7 :-)
Errors are usually a good sign. This is what I expect when I do the first compilation. They mostly indicate that the compiler needs some help to generate the binding.
What you will read next is the process I apply to solve those binding errors. As stated in the previous article, this series does not aim to provide a solution to every problem but show you how I deal with them.
The most usual one is naming conflicts. They often occur because some member methods or classes have the same name as their parent class. Fixing those errors are pretty straightforward as you need to either rename the class or the method.
Here are a few exemples of naming conflicts:
Com.MySdk.ISomeInterface.cs(80,80): Error CS0102: The type 'ErrorEventArgs' already contains a definition for 'error' (CS0102) (MySDK)
Com.MySDK.Ma.cs(24,24): Error CS0542: 'Ma': member names cannot be the same as their enclosing type (CS0542) (MySDK)
Com.MySDK.IMyListener.cs(10,10): Error CS0111: Type 'ErrorEventArgs' already defines a member called 'ErrorEventArgs' with the same parameter types (CS0111) (MySDK)
Fun fact: Most of the errors come from the fact that C# does not allow some of the things Java is fine with :)
Double-clicking on the error in Visual Studio will redirect you to the generated code where you can see some comments:
// event args for com.mysdk.SomeListener.onError
public partial class ErrorEventArgs : global::System.EventArgs {
public ErrorEventArgs (global::Com.MySDK.ISDKError error)
{
this.error = error;
}
global::Com.MySDK.MyConfig.ISDKError error;
public global::Com.MySDK.MyConfig.ISDKError Error {
get { return error; }
}
}
As you can see, the comment gives you a java type name. That might prove to be useful.
Scrolling up you might notice comments starting with Metadata.xml
:
// Metadata.xml XPath interface reference: path="/api/package[@name='com.mysdk.listener']/interface[@name='SomeListener']"
[Register ("com/mysdk/SomeListener", "", "...")]
public partial interface ISomeListener : IJavaObject, IJavaPeerable {
// Metadata.xml XPath method reference: path="/api/package[@name='com.mysdk.listener']/interface[@name='SomeListener']/method[@name='onError' and count(parameter)=1 and parameter[1][@type='com.mysdk.sdkconfig.SDKError<com.mysdk.model.someErrorCode>']]"
[Register ("onError", "...", "...")]
void OnError (global::Com.MySDK.MyConfig.ISDKError error);
...
}
Those comments give the correct syntax to add into the Metadata.xml
file to reference classes or methods. You can be as precise as referencing a specific parameter as well.
In the Metadata.xml
file, I want to reference the OnError
method of the ISomeListener
interface.
I will therefore copy the path defined in the comment into an attr
attribute:
<attr path="/api/package[@name='com.mysdk.listener']/interface[@name='SomeListener']/method[@name='onError' and count(parameter)=1 and parameter[1][@type='com.mysdk.sdkconfig.SDKError<com.com.mysdk.model.someErrorCode>']]" ...></attr>
Basically, we are using an XPath syntax to query our native library and apply some modifications on them.
If there is only one overload of a method, specifying the parameters arguments is not necessary:
<attr path="/api/package[@name='com.mysdk.listener']/interface[@name='SomeListener']/method[@name='onError']" ...></attr>
If I want to rename the interface I can use the managedName
operator:
<attr path="/api/package[@name='com.mysdk.listener']/interface[@name='SomeListener']"
name="managedName">ISomeOtherName</attr>
This operator works on every element so you can apply it on namespaces, classes, interfaces or methods.
<attr path="/api/package[@name='com.mylibrary.mycomponent.cde']/class[@name='abc']" name="managedName">AbcObject</attr>
Sometimes, event args conversion fails because of naming conflicts too.
In that case, I use the argsType
operator to change the parameter’s type.
<attr path="/api/package[@name='com.mylibrary.mycomponent.listener']/interface[@name='ChangeListener']/method[@name='onError']" name="argsType">ChangeListenerOnErrorEventArgs</attr>
There are many operators available which you can have a list in the famous Gist from Jon Douglas referenced links.
Most of the time, fixing those naming issues will make your binding compilation pass. But it does not mean it is over yet!
I now need to look at the generated binding. If it compiles, it is testable!
The testing phase will be described in details in the next article of this series.
At that step of the process, I go to the C# sample project to check for any missing methods or types. I look at my Java sample and try to find the types and methods I need with Intellisense in my C# project. I find the process much faster that way.
If no classes or methods are missing then perfect, I go straight to the cleanup phase. But if I have some missing elements, I need to find why.
To help me with the investigation here are the questions I try to find answers for:
Repeat those questions for every type helps to have a clear view of what needs fixing.
Now that I know what is missing for my sample, I can work on fixing the binding.
Warnings in Xamarin Android projects are important as they indicate something went wrong but not wrong enough to prevent the compilation.
Usually, I try to fix most of them starting with the infamous:
BINDINGSGENERATOR: Warning BG8503: Invalidating SomeNamespace.SomeType and all nested types because some of its methods were invalid. (BG8503)
Invalidating means that a big bunch of classes and method have been removed. Therefore I always treat those warnings as errors to fix my issues.
Chances are, that if we fix those errors, we will get back some of the missing members needed.
So how can we fix them?
That depends on the error hence we need to understand very well the native library.
My experience shows that most of the time when dependencies are referenced correctly, obfuscation is a probable culprit.
Writing this kind of code is no fun. Hopefully, we only need to fix the types causing the issues.
Also, if the library is obfuscated in a somewhat predictable way, it is possible to write scripts to generate those obfuscation elements.
<attr path="/api/package[@name='util.z']/class[@name='a.b']" name="obfuscated">false</attr>
For those interested here is a dummy PowerShell sample I made.
Please note that it requires the jd-cli
command-line tool.
Sometimes, even if we have all the references needed, some methods or classes might fail to be generated.
The first thing I do is check the api.xml
file to verify that the class or method I need is there.
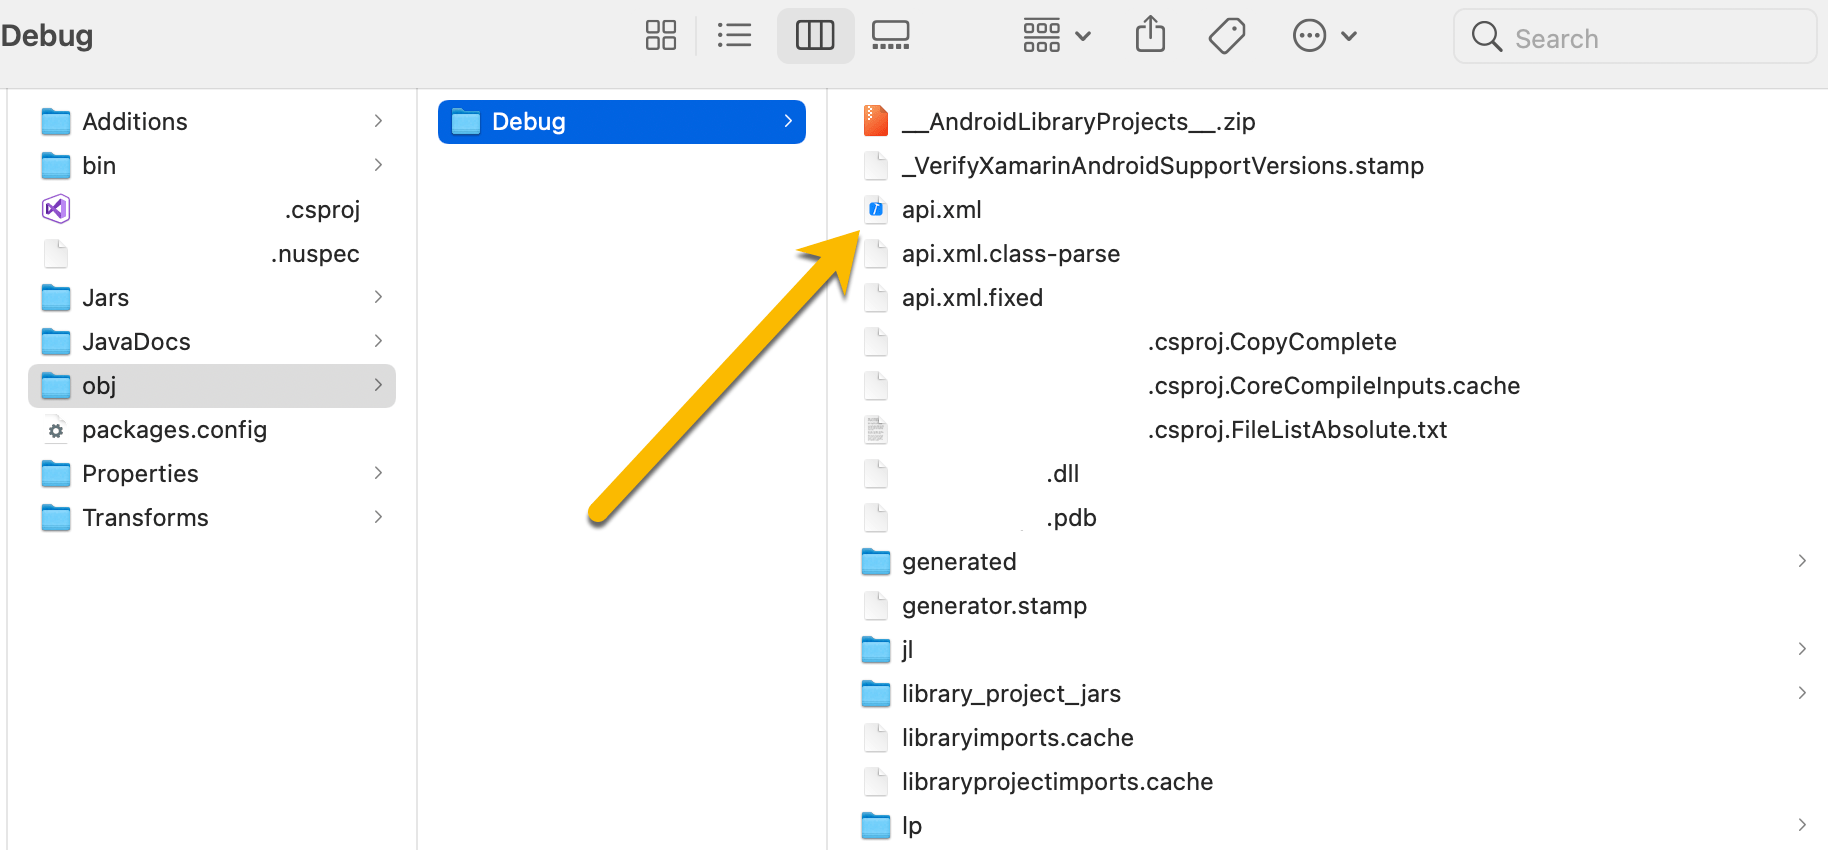
You can find the api.xml
in your project build folder: obj/debug/api.xml
.
It basically shows what the binding process will expose.
In case it is not, I manually add what is missing to the Metadata.xml
:
<add-node path="/api/package[@name='com.huawei.hms.support.api.client']/class[@name='ResolvingResultCallbacks']">
<method name="onSuccess" return="void" abstract="false" native="false" synchronized="false" static="false" final="false" deprecated="not deprecated" visibility="public">
<parameter name="context" type="java.lang.Object" />
</method>
</add-node>
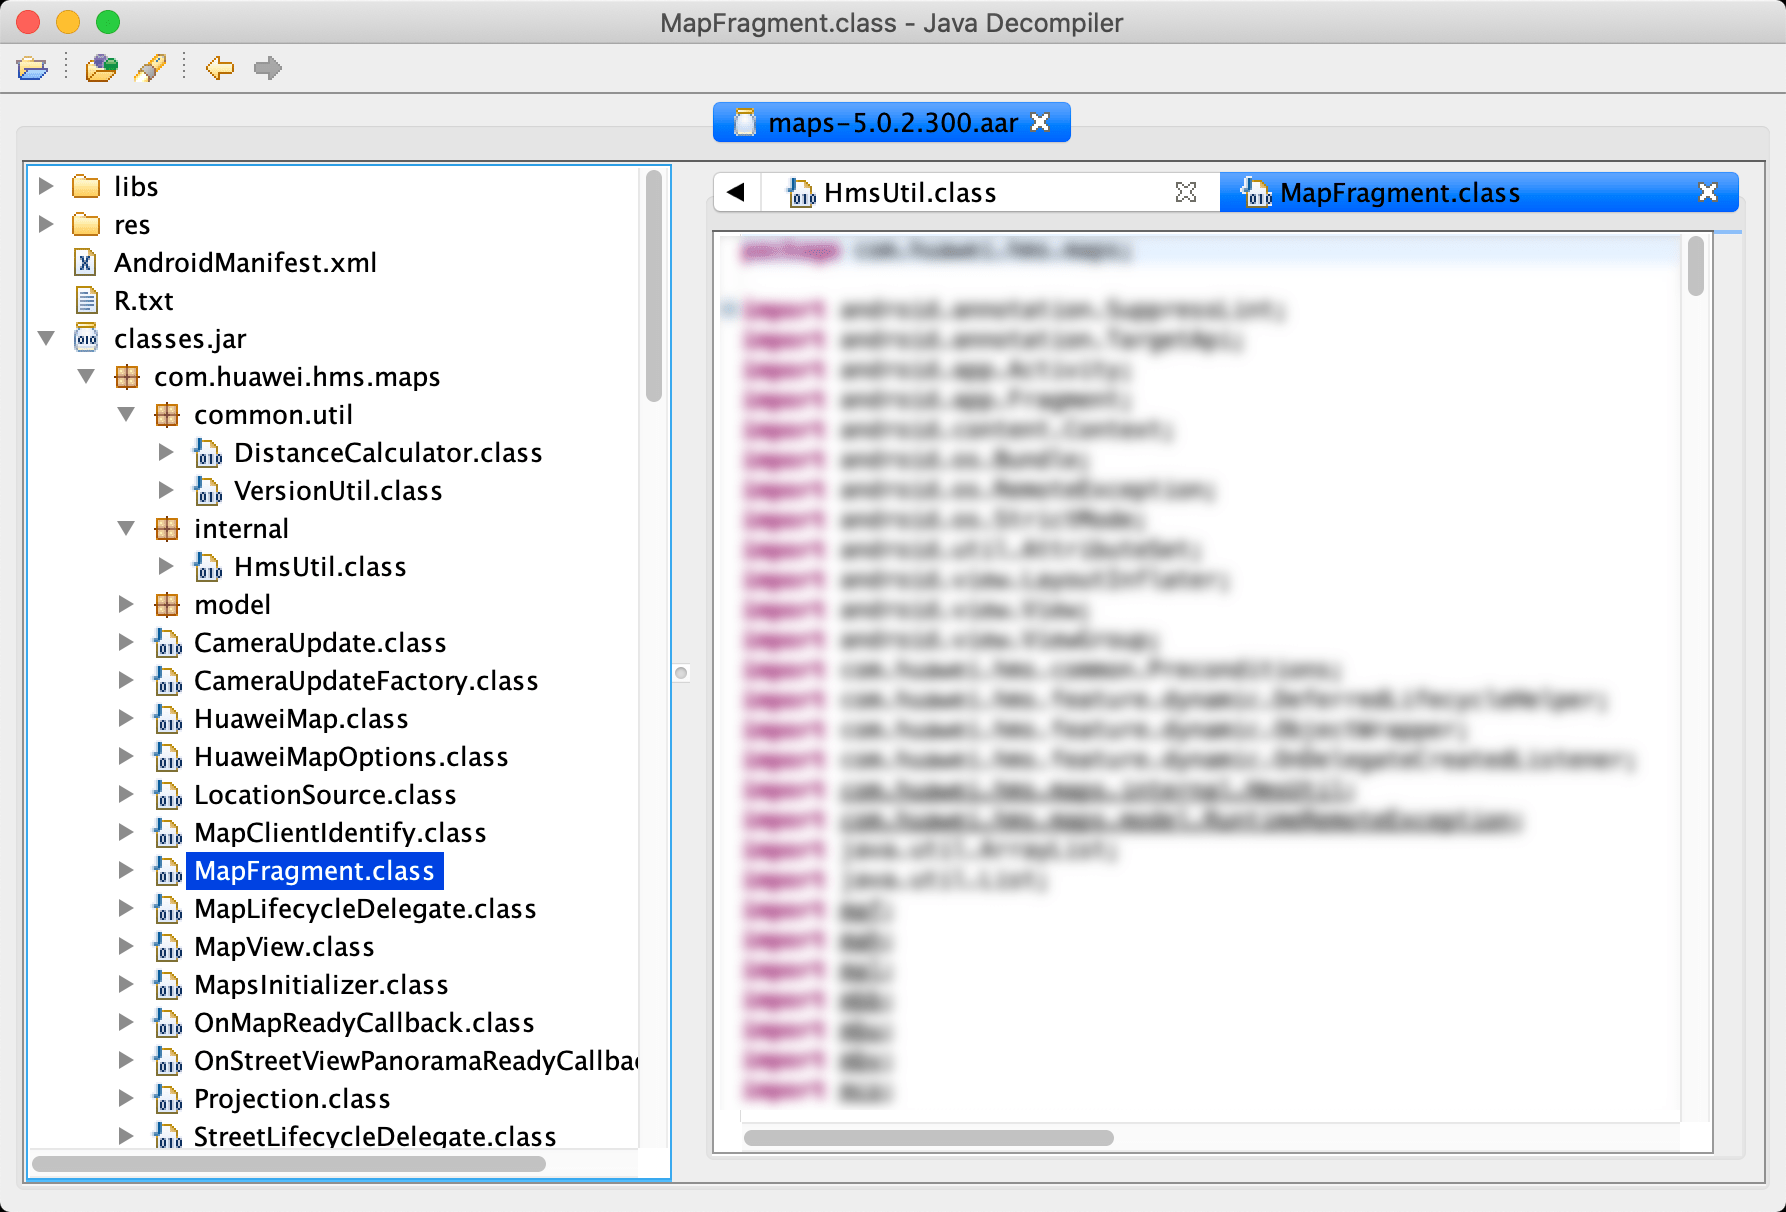
Of course, we need to know what to write there. To help, I usually look at similar methods or classes in the api.xml
and write the same thing in Metadata.xml
. As for the path
attribute you can copy it from JD-GUI
.
Sometimes, some members are generated but not useful to C# and even might create issues.
In those cases I remove them:
<remove-node path="/api/package[@name='com.huawei.hms.common.data']/class[@name='DataHolder']/method[@name='finalize' and count(parameter)=0]" />
<remove-node path="/api/package[@name='com.huawei.hms.support.api.client']/class[@name='ResolvingResultCallbacks']/method[@name='onSuccess' and count(parameter)=1 and parameter[1][@type='R']]" />
In the Huawei binding, I encounter some properties that were generated because a method was called getSomething
but was not a getter.
To fix that, I instructed the binding to not generate a property and keep the method by setting its name to empty:
<attr path="/api/package[@name='com.huawei.hms.location']/class[@name='FusedLocationProviderClient']/method[@name='getLastLocation']" name="propertyName"></attr>
<attr path="/api/package[@name='com.huawei.hms.location']/class[@name='FusedLocationProviderClient']/method[@name='getLocationAvailability']" name="propertyName"></attr>
<attr path="/api/package[@name='com.huawei.hms.location']/class[@name='FusedLocationProviderClient']/method[@name='getLastLocationWithAddress']" name="propertyName"></attr>
<attr path="/api/package[@name='com.huawei.hms.ml.scan']/class[@name='HmsScan.AddressInfo']/method[@name='getAddressDetails']" name="propertyName"></attr>
<attr path="/api/package[@name='com.huawei.hms.ml.scan']/class[@name='HmsScan.AddressInfo']/method[@name='getAddressType']" name="propertyName"></attr>
We now have all the necessary types and methods. That does not mean the work is over yet.
Usually, I try to clean up a bit the bindings at this step.
Of course, the cleanup process is important when I do a public binding. For private ones, I can accept some rough edges to save time.
I like renaming namespaces that do not feel like .NET at all:
<attr path="/api/package[@name='com.huawei.hmf.tasks']" name="managedName">Huawei.Hmf.Tasks</attr>
This is what I used in the Huawei binding since I would rather not have Com.Something
in C#.
I can also rename some parameters if I find them necessary yet usually I stop there with renaming.
Finally, for types that are Java tasks or callbacks, I like to add some code in the Additions.cs
.
public class DelegateLocationCallback : LocationCallback
{
private Action<LocationResult> _onLocationResult;
public DelegateLocationCallback(Action<LocationResult> onLocationResult)
{
_onLocationResult = onLocationResult;
}
protected override void Dispose(bool disposing)
{
base.Dispose(disposing);
_onLocationResult = null;
}
public override void OnLocationResult(LocationResult locationResult)
{
_onLocationResult?.Invoke(locationResult);
}
}
Adding code in this file will make it available to every consumer of the library easing code sharing.
By following all these steps, I have working binding.
Of course, the process is not linear so I go back and forth from fixing errors to warnings and so on.
I find this important to apply those steps and it helped me a lot in writing those bindings.
So hopefully that will help you too!
If you want a good example of what I highly I recommend that you go and check my Huawei mobile services binding and the associated article.
In the next article, I will describe how I do to test the bindings I work on.
Keep posted and as always, feel free to read my previous posts and to comment below, I will be more than happy to answer.
Creating a Xamarin Android binding library is not an easy task.
As I have done quite a lot of those on private or public SDKs, I decided to give you my feedback on how I actually do it.
Of course, as every library is different, this will not be a solution for every native library out there. Think of this as a reusable template of tasks you can apply whatever the library you are trying to bind.
As my daily driver is a Mac, everything I will explain here works on macOS. Some adaptations might be occasionally necessary on Windows.
This article is the first of a series of 4 articles:
Before actually jumping on creating a binding library I must have a good understanding of the underlying native library. To help me with that I have installed some tools.
When I create a binding library, I want to be sure that any error that occurs, is occurring because the binding created is wrong and not because there is a bug or a misunderstanding with the native library.
I therefore always create a minimal native sample using the library I want to bind in Android Studio.
Working in Java is easier in my opinion for this than in Kotlin as Kotlin brings additional things that are not necessary.
Once I have a working sample, I try to use every method that seems interesting and verify that the project works.
To bind a library I need either an aar file or a jar file.
Of course, in case I already have those I skip the following steps.
As I am a lazy developer, I use a tool like Charles Proxy to get the URL of the native libraries and their dependencies by performing the following steps:
These URLs will also be useful at the very end of this series to create the building scripts and NuGet packages.
As with NuGet packages, Android native libraries might reference other ones.
Obviously, those dependencies should be present in the Xamarin Android project somehow (more on this in an upcoming article).
Fortunately, there is a quick and easy way to get this list with the Android Studio project created earlier.
With this, I now understand the relationship between every component.
Now that I know how to use this native library, I need to understand how it is built. For that, there is no better way than to decompile it. Android Studio has a decompiler built-in but I personally like to have a minimal one on the side.
My Java decompiler of choice on macOS is JD-GUI. As it is based on a command-line tool it is scriptable (more on this in an upcoming article).
You can see here that we get the list of all the packages and classes which will be mandatory to perform the binding.
By following all these steps I have a native sample working with Android Studio that is my source of truth.
I have the list of all the dependencies of this library and I have downloaded everything.
I can decompile the native library to understand how it is built.
All of this might seem nothing but I spent countless hours trying to understand what dependency I was missing, where they were stored etc…
So hopefully that will save you some time!
Keep posted for the next article in the series and as always, please feel free to read my previous posts, and to comment below, I will be more than happy to answer.
]]>I will not go into the why Huawei has created Huawei Mobile Services nor if it is a good or a bad thing. This is not the purpose of this article. I will not answer to any political comment that may arise from it. I speak about technical stuff and only that :-)
You most probably have an existing Xamarin Android application using Google Play Services. Using them with Xamarin is straightforward as Microsoft is doing the job of binding everything. It is not an easy job by the way so thanks a lot to the team!
Let’s say you need to provide a new application or convert an exsisting one to use Huawei Mobile Services.
The first thing you do as a Xamarin developer is to go to Nuget and realise that there are no Microsoft official or Huawei official Nuget packages. I tested some of the third parties one but unfortunately they did not fit my needs as they had some missing methods and the binding source code was not provided to fix it.
As I did not release any Nuget packages yet, as I had the need for those and as I have done (and still do) some pretty complex Xamarin Android bindings I decided to just do it and share everything with you.
For the project I am working on I needed 4 features:
At the time I am writing those lines, I have created the binding of 5 Huawei SDKs:
I did not need the HiAnalytics SDK for my project. It was a need that emerged from the community so I decided to bind it as well.
Unfortunately, the clustering part of the Huawei Map Kit is not the most performant so I decided to bind a third party library that you can find here:
All of the source code can be found in this GitHub repository:
You can build the packages locally if need by using the cake script at the root of the repository. This script will take care of downloading all the necessary dependencies from Huawei. As such, the GitHub repository is free from big binaries. It will also build and package the code.
I have uploaded the packaged bindings to Nuget. You can find them under my published packaged list:
https://www.nuget.org/profiles/JohnThiriet
Please note that those packages are still in preview. I decided to match the version number with the one of the Huawei binaries. It seemed the most logical thing to do. Because of that, as soon as I publish a final version of these packages I cannot update them without breaking this version number relationship. As such, I give some time to the community to find some missing methods etc… At one point I will republish everything in a final version.
Do not forget to activate preview packages in your IDE to use the packages.
If you click on the link above, you will see about 24 packages. You do not need to reference them all and you should not. You should only reference the main ones cited in the binding section of this article.
Packages that should not be referenced directly will have this description: “Xamarin Binding Library - ***. This SDK is a dependency of various Huawei Hms SDKs and is not intended to be used directly.”
To have a clear example on how to integrate those packages in a Xamarin Android application I have created a sample project:
Xamarin.Android.Huawei.Hms.Demo
Some instructions are present in the repository to help you run the sample.
I still want to put the emphasis on some of most important ones here to run Hms inside your own application.
To run the application you will need a phone with the Huawei Mobile Services. The most obvious choice for that is to have a Huawei device with App Gallery up to date.
You can install them on non-Huawei devices by installing the App Gallery on your device. and then the Hms Core from App Gallery. I will let you use your favorite search engine to find instructions on how to do it if needed.
Much like with Google Play Services, you will need a developer account that can be created for free on the Huawei developer portal. You will need to declare an application there and to activate the services you want to use.
Everything is detailed in the official documentation (link at the end of the article).
To use the Huawei Mobile Services you will need to modify the application manifest. Most importantly, you will need to add this line under the application element to declare your application identifier. And do not forget the replace it with the one that you find on the Huawei developer portal.
<meta-data
android:name="com.huawei.hms.client.appid"
android:value="appid=YOUR_APP_ID" />
You will also need to declare this permission just above the application element of the manifest.
<uses-permission
android:name="com.huawei.appmarket.service.commondata.permission.GET_COMMON_DATA" />
In order for Hms to work with Xamarin there are 3 things to do.
agconnect-services.json
found in the Huawei developer portal for application to your project’s Assets
folder and set its build property to AndroidAsset
.HmsLazyInputStream.cs
from the demo sample to your own project.XamarinCustomProvider.cs
as well.Note the presence of the InitOrder
property in the XamarinCustomProvider
. If you do not set it, the HiAnalytics SDK will not work. It’s fine for all the other ones I used though.
PushKit needs to be initialized. To ease the process simple add this line in the manifest file under the application identifier.
<meta-data
android:name="push_kit_auto_init_enabled"
android:value="true" />
MapKit and LocationKit need some permissions that needs to be added in the manifest as well.
<uses-permission
android:name="android.permission.INTERNET"/>
<uses-permission
android:name="android.permission.ACCESS_NETWORK_STATE"/>
<uses-permission
android:name="android.permission.ACCESS_COARSE_LOCATION"/>
<uses-permission
android:name="android.permission.ACCESS_FINE_LOCATION"/>
You can find lots of documentation including ones for Xamarin in the Huawei developers website:
https://developer.huawei.com/consumer/en/hms
Scroll down and select Cross-Platform
under the Resource Center
section to find everything related to Xamarin development.
Using the Huawei Mobile Services is really similar the Google Play Services, you need to declare an application there, get the Sha of your keystore and sign your application with it. They did not try to reinvent the wheel and in some cases (like the map) the APIs are the same as their Google counterparts with mostly only namespaces changes.
With that being said, it was an interesting challenge for me and I hope it will prove useful for many more people. Please use the GitHub to raise issues if you have some on the binding or the demo project.
And as always, please feel free to read my previous posts and to comment below, I will be more than happy to answer.
]]>For this blog post, I consider that you know how to export analytics data from your mobile application from App Center to Application Insights. If it is not the case you will find all the information you need in the previous article.
As a mobile developer, I consider that one of the biggest tasks we have is to deliver an application that has as few errors as possible. App Center comes with a very complete and cool dashboard where the distinction is made between two kinds of errors: crashes and handled errors.
Sometimes we need to present data in a custom dashboard this is where Application Insights comes into play.
App Center does not export issues to Application Insights in the same way you can see them in App Center dashboard. Instead, it just exports the fact that an issue has occurred which is more enough to create some interesting request.
Let’s start easy by looking at all the crashes data sent to Application Insights:
customEvents
| where name == "UnhandledErrorLog"
| limit 1
Handled errors are managed in the same way as crashes inside Application Insights. The only difference is the custom event name:
customEvents
| where name == "HandledErrorLog"
| limit 1
As you can see in the screenshot above, we have an entry for a crash and this entry contains data that can help to build a custom dashboard:
Let’s create a more interesting request in Application Insights that gets the number of crashes on iOS per day, per platform, per country.
customEvents
| where timestamp > ago(30d)
| where name == "UnhandledErrorLog"
| summarize crashes=count() by bin(timestamp, 1d), client_Model, client_CountryOrRegion
The same can be done for handled errors.
customEvents
| where timestamp > ago(30d)
| where name == "HandledErrorLog"
| summarize crashes=count() by bin(timestamp, 1d), client_Model, client_CountryOrRegion
And this is the kind of results we can get:
timestamp [UTC] | client_Model | client_CountryOrRegion | crashes |
---|---|---|---|
4/30/2020 | samsung | fr | 3 |
4/30/2020 | samsung | us | 2 |
4/30/2020 | Apple | fr | 4 |
4/30/2020 | Apple | us | 1 |
4/30/2020 | HUAWEI | fr | 1 |
4/29/2020 | samsung | fr | 7 |
4/29/2020 | Apple | fr | 2 |
4/29/2020 | Sony | fr | 2 |
4/29/2020 | WIKO | fr | 7 |
Of course, the data here is fake. What is important to see is that you get a duplicated entry per day because we asked to have the phone model as well as the country. This data can then be used to generate some graphs directly in Application Insights or even better in a Power BI dashboard.
With App Center we can collect data about crashes and errors. Thanks to Application Insights we can query this data to create a meaningful tailored dashboard. While we do not get all the details about those errors it can still provide data that would be hard to expose in another way.
If you need to extract all those data, please stay tuned for an upcoming post! If that is of any interest to you, please let me know on Twitter or in the comments below if you’d find it interesting.
As always, please feel free to read my previous posts and to comment below, I will be more than happy to answer.
]]>App Center is an awesome tool. Amongst other features it provides analytics for our application. Its dashboard is really simple and so, whether it is by habbit or because of its limited dashboard, mobile developers often tend to use tools like Firebase for their analytics.
While Firebase provides good dashboards by default it is sometimes still not enough. Furthermore, not every developer or company can have its analytics data stored inside Google’s or any other third party providers’ servers.
App Center is not designed to be a full fledged analytics portal. To get the most out of it we need to enter the wonderful world of Application Insights.
The purpose of this post is to show how to can use Application Insights to extract meaningful information from any mobile application, whatever it is using Xamarin or not.
For this post I assume that you have a mobile application connected to App Center. If you need more informations on how to add App Center SDK into your application please refer to https://appcenter.ms.
Of course, to simplify things I have created a really simple Xamarin.Forms application consisting of three buttons.
...
<Button Text="Red" Clicked="OnRedButtonClicked" />
<Button Text="Green" Clicked="OnGreenButtonClicked" />
<Button Text="Blue" Clicked="OnBlueButtonClicked" />
...
...
using Microsoft.AppCenter;
using Microsoft.AppCenter.Analytics;
...
public void OnRedButtonClicked(object sender, EventArgs e)
{
Analytics.TrackEvent("Color", new Dictionary<string, string> { { "Value", "Red" } });
}
private void OnGreenButtonClicked(object sender, EventArgs e)
{
Analytics.TrackEvent("Color", new Dictionary<string, string> { { "Value", "Green" } });
}
private void OnBlueButtonClicked(object sender, EventArgs e)
{
Analytics.TrackEvent("Color", new Dictionary<string, string> { { "Value", "Blue" } });
}
...
When the user clicks on one of the buttons, it uses App Center SDK to send a Color
event with the actual color value in the properties
parameter of the TrackEvent
method.
We can verify that we are sending the events correctly by going into App Center’s application dashboard. Under the Analytics
section, select Events
. Click on our event name and we should see something like the image below.
Whether we are using Xamarin or not, as long as it is on iOS or Android, what is described in this post will work.
We now need to configure the export:
Export
New export
Exporting to Blob Storage requires more work but is more customizable. For the sake of simplicity we stay with Application Insights here.
We need to associate App Center with an Azure subscription to configure the data export:
In the Azure section of App Center click on the +
button as shown in the screenshot below.
You will be asked to log into your Azure account.
Upon successful login click on Connect
to finalize the association.
The process redirects back to App Center with the subscription added.
Select the newly added subscription.
Add this subscription to the desired applications.
Finally, with these steps completed we can configure the exportations by restarting the steps at the previous paragraph: Exporting to Application Insights
Customize
instead if you already have an instance.Add to subscription
Congratulations, set up is now complete !
Exporting to Azure does not happen in real time. You need to wait a few minutes before actually being able to work on the analytics you have.
If you have chosen the standard export you can go directly to Azure from App Center either by clicking on the View in Azure
button in the Export
section or by clicking on View in Application Insights
in the Analytics
section of the application.
In Application Insights you can look for every events by clicking on Search
and query them by clicking on Logs
.
By clicking on Search
we find the list of every events.
We can of course see events details.
Among the many interesting properties we see that the additional informations we sent are located into the Properties
property of the event as a serialized Json object.
By clicking on Logs
we are presented an interface where we can type Kusto queries.
For more informations on Kusto please look at the official documentation.
Let’s enter of first request where we will look for every event named Color
and we will count the number of times each color has been selected on the past day.
customEvents
| where timestamp >= ago(1d)
| where itemType == "customEvent"
| where name == "Color"
| extend Properties = todynamic(tostring(customDimensions.Properties))
| extend ColorValue = tostring(Properties.Value)
| summarize count(ColorValue) by ColorValue
By defaults results are shown as tabular data.
But we can have a more graphical representation too.
Charts color or label are not configurable for now. Hopefully there is a better way and for this read until the end.
App Center is free for analytics. Application Insights as a pricing model that can be found here: https://azure.microsoft.com/en-us/pricing/details/monitor/
By default, Application Insights has a data retention of 90 days. I highly suggest that you increase this value and that you consider exporting to a blob storage from Application Insights or from App Center as shown previously.
By using App Center and Application Insights you keep the ownership of your data and you can choose how long you want to keep it, if not indefinitely.
By using a custom set up of Application Insights, you can choose where you want your data to be stored. It is very important for applications that must comply with local rules like the GDPR in Europe.
Now that data is sent from App Center to Application Insights, we have a persistent storage and powerful quering capabilities on them. Furthermore, we keep the property of this data.
If your company is already using Azure you may already find people within your organization with Application Insights skills and therefore might find a way to have an even better use of it.
I recommend that you start writing a lot of queries to extract meaningful data from the usage of your application. queries written in Kusto can be used as well in a Power BI dashboards !
I guess that will be for the next article, please let me know on Twitter or in the comments below if you’d find it interesting.
As always, please feel free to read my previous posts and to comment below, I will be more than happy to answer.
]]>Most mobile applications require network connection. Unfortunately, analysing calls is not so easy. Ask most developers how to do and we will get such answers:
As we can see, most answers involve a modification of the code. This is far from being the most convenient or efficient approach. Hopefully there is a better way.
Whether you are using Xamarin or not, as long as it is on iOS or Android, what is described in this post will work.
Web debugging proxies allow developers to analyse network calls coming out from any application.
The most well known debugging proxies on the market are:
In this article we will use Charles Proxy.
Once Charles Proxy is installed and launched, we need to get our local ip.
This is the IP we will need to set as a proxy in the phones network parameters.
Obviously, for this to work correctly, the phone needs to be on the same network than the computer with Charles Proxy.
Setting the IP address differs from phone to phone but let see to examples.
In order to decrypt SSL traffic, we need to activate Charles’s SSL proxying.
In Charles Proxy:
Proxy
.SSL Proxying Settings
.Enable SSL Proxying
option.Do not forget to include
domains you want to decrypt the traffic for.
Finally we need to install Charles’s custom SSL certificate in the mobile device.
Trusting a certificate in iOS requires a lot of different steps. Please follow the steps carefully as in the screenshots below.
General
select the Profile
item.install
menu item.install
once again.done
.General
select the About
item.Certificate Trust Settings
element.Continue
to confirm.http://chsl.pro/ssl
and download the certificate. It will download the certificate in your downloads folder.charles-proxy-ssl-proxying-certificate.pem
) and tap on it.VPN and apps
.On most devices this should be enough, but some might require more steps so please check at your device specificities before continuing.
Since Android 8, an additional step is required at the application level to allow the whole process.
resources/values/xml
.network_security_config.xml
.android:networkSecurityConfig
property.You should have a process to remove network_security_config
at build time for production builds to prevent anyone from analysing your application.
<?xml version="1.0" encoding="utf-8"?>
<network-security-config>
<!-- You should remove this for store builds -->
<base-config>
<trust-anchors>
<certificates src="system" />
<certificates src="user" />
</trust-anchors>
</base-config>
<debug-overrides>
<trust-anchors>
<!-- Trust user added CAs while debuggable only -->
<certificates src="user" />
<!-- Trust preinstalled CAs -->
<certificates src="system" />
</trust-anchors>
</debug-overrides>
</network-security-config>
<application android:networkSecurityConfig="@xml/network_security_config" ...>
...
</application>
Better safe than sorry. You really need to remove network_security_config
for production builds !
If you are using Xamarin to create your application, make sure that HttpClient uses native http handlers or the device’s proxy configuration will be ignored:
Now that Charles Proxy and the phones are set up, tracing works correctly. On the top you should see network calls made. Selecting a call lets you explore headers, parameters, requests and responses.
It is possible to do more, but this will be for another time!
As always, please feel free to read my previous posts and to comment below, I will be more than happy to answer.
]]>To circumvent this problem, I had been using the Calligraphy library for the past couple of years, as well as embedding those fonts inside the application.
At last, Android 8 (API level 26) introduced a native solution to this problem. This feature is also supported on devices till Android 4.1 by using Support Library 26 or more.
It was surprisingly not easy to find some proper steps to achieve this in Xamarin hence the writing of this blog post.
The natural way to use a custom font is to include it inside the application bundle. Android Studio comes with a wizard to do this, but unfortunately we do not have this luxury in Visual Studio. It is not a big issue though as doing it manually is pretty straightforward.
font
under the Resources
folder.modak_regular.ttf
.AndroidResource
.A font family file is necessary to reference the font. It consists of a collection of font elements which defines the font style or font weight.
font
folder create a new xml file and give it a name like : modak.xml
.AndroidResource
.<?xml version="1.0" encoding="utf-8"?>
<font-family xmlns:android="http://schemas.android.com/apk/res/android"
xmlns:app="http://schemas.android.com/apk/res-auto">
<font android:font="@font/modak_regular"
android:fontStyle="normal"
android:fontWeight="400"
app:font="@font/modak_regular"
app:fontStyle="normal"
app:fontWeight="400" />
</font-family>
Finally use the font in any widget by referencing the font family created above.
<TextView
android:text="My text content"
android:layout_width="wrap_content"
android:layout_height="wrap_content"
android:fontFamily="@font/modak" />
Of course embedding a font makes the application bigger and if lots of applications on the user’s device uses the same font he gets them several times for nothing. That is why Google introduced downloadables fonts.
The implementation of downloadable fonts in Android is pretty simple and can be summed up like this : A font provider like Google Fonts has the font we want to use. In order to use it, we need to tell Android which font it is and from which font provider to get it.
font
folder, create a new xml file for exemple : modak.xml
.AndroidResource
.<?xml version="1.0" encoding="utf-8"?>
<font-family xmlns:app="http://schemas.android.com/apk/res-auto"
app:fontProviderAuthority="com.google.android.gms.fonts"
app:fontProviderPackage="com.google.android.gms"
app:fontProviderQuery="Modak"
app:fontProviderCerts="@array/com_google_android_gms_fonts_certs">
</font-family>
The font provider in this case is Google Fonts. If you need to use another font provider, you will need to update the values above accordingly.
If you are using the support libraries, it is necessary to declare the certificates of the font providers.
The exemple below is for Google Fonts. If you have other providers you will need to add or update values in accordingly.
Resouces/values
folder, create a new font_certs.xml
file.AndroidResource
.<?xml version="1.0" encoding="utf-8"?>
<resources>
<array name="com_google_android_gms_fonts_certs">
<item>@array/com_google_android_gms_fonts_certs_dev</item>
<item>@array/com_google_android_gms_fonts_certs_prod</item>
</array>
<string-array name="com_google_android_gms_fonts_certs_dev">
<item>
MIIEqDCCA5CgAwIBAgIJANWFuGx90071MA0GCSqGSIb3DQEBBAUAMIGUMQswCQYDVQQGEwJVUzETMBEGA1UECBMKQ2FsaWZvcm5pYTEWMBQGA1UEBxMNTW91bnRhaW4gVmlldzEQMA4GA1UEChMHQW5kcm9pZDEQMA4GA1UECxMHQW5kcm9pZDEQMA4GA1UEAxMHQW5kcm9pZDEiMCAGCSqGSIb3DQEJARYTYW5kcm9pZEBhbmRyb2lkLmNvbTAeFw0wODA0MTUyMzM2NTZaFw0zNTA5MDEyMzM2NTZaMIGUMQswCQYDVQQGEwJVUzETMBEGA1UECBMKQ2FsaWZvcm5pYTEWMBQGA1UEBxMNTW91bnRhaW4gVmlldzEQMA4GA1UEChMHQW5kcm9pZDEQMA4GA1UECxMHQW5kcm9pZDEQMA4GA1UEAxMHQW5kcm9pZDEiMCAGCSqGSIb3DQEJARYTYW5kcm9pZEBhbmRyb2lkLmNvbTCCASAwDQYJKoZIhvcNAQEBBQADggENADCCAQgCggEBANbOLggKv+IxTdGNs8/TGFy0PTP6DHThvbbR24kT9ixcOd9W+EaBPWW+wPPKQmsHxajtWjmQwWfna8mZuSeJS48LIgAZlKkpFeVyxW0qMBujb8X8ETrWy550NaFtI6t9+u7hZeTfHwqNvacKhp1RbE6dBRGWynwMVX8XW8N1+UjFaq6GCJukT4qmpN2afb8sCjUigq0GuMwYXrFVee74bQgLHWGJwPmvmLHC69EH6kWr22ijx4OKXlSIx2xT1AsSHee70w5iDBiK4aph27yH3TxkXy9V89TDdexAcKk/cVHYNnDBapcavl7y0RiQ4biu8ymM8Ga/nmzhRKya6G0cGw8CAQOjgfwwgfkwHQYDVR0OBBYEFI0cxb6VTEM8YYY6FbBMvAPyT+CyMIHJBgNVHSMEgcEwgb6AFI0cxb6VTEM8YYY6FbBMvAPyT+CyoYGapIGXMIGUMQswCQYDVQQGEwJVUzETMBEGA1UECBMKQ2FsaWZvcm5pYTEWMBQGA1UEBxMNTW91bnRhaW4gVmlldzEQMA4GA1UEChMHQW5kcm9pZDEQMA4GA1UECxMHQW5kcm9pZDEQMA4GA1UEAxMHQW5kcm9pZDEiMCAGCSqGSIb3DQEJARYTYW5kcm9pZEBhbmRyb2lkLmNvbYIJANWFuGx90071MAwGA1UdEwQFMAMBAf8wDQYJKoZIhvcNAQEEBQADggEBABnTDPEF+3iSP0wNfdIjIz1AlnrPzgAIHVvXxunW7SBrDhEglQZBbKJEk5kT0mtKoOD1JMrSu1xuTKEBahWRbqHsXclaXjoBADb0kkjVEJu/Lh5hgYZnOjvlba8Ld7HCKePCVePoTJBdI4fvugnL8TsgK05aIskyY0hKI9L8KfqfGTl1lzOv2KoWD0KWwtAWPoGChZxmQ+nBli+gwYMzM1vAkP+aayLe0a1EQimlOalO762r0GXO0ks+UeXde2Z4e+8S/pf7pITEI/tP+MxJTALw9QUWEv9lKTk+jkbqxbsh8nfBUapfKqYn0eidpwq2AzVp3juYl7//fKnaPhJD9gs=
</item>
</string-array>
<string-array name="com_google_android_gms_fonts_certs_prod">
<item>
MIIEQzCCAyugAwIBAgIJAMLgh0ZkSjCNMA0GCSqGSIb3DQEBBAUAMHQxCzAJBgNVBAYTAlVTMRMwEQYDVQQIEwpDYWxpZm9ybmlhMRYwFAYDVQQHEw1Nb3VudGFpbiBWaWV3MRQwEgYDVQQKEwtHb29nbGUgSW5jLjEQMA4GA1UECxMHQW5kcm9pZDEQMA4GA1UEAxMHQW5kcm9pZDAeFw0wODA4MjEyMzEzMzRaFw0zNjAxMDcyMzEzMzRaMHQxCzAJBgNVBAYTAlVTMRMwEQYDVQQIEwpDYWxpZm9ybmlhMRYwFAYDVQQHEw1Nb3VudGFpbiBWaWV3MRQwEgYDVQQKEwtHb29nbGUgSW5jLjEQMA4GA1UECxMHQW5kcm9pZDEQMA4GA1UEAxMHQW5kcm9pZDCCASAwDQYJKoZIhvcNAQEBBQADggENADCCAQgCggEBAKtWLgDYO6IIrgqWbxJOKdoR8qtW0I9Y4sypEwPpt1TTcvZApxsdyxMJZ2JORland2qSGT2y5b+3JKkedxiLDmpHpDsz2WCbdxgxRczfey5YZnTJ4VZbH0xqWVW/8lGmPav5xVwnIiJS6HXk+BVKZF+JcWjAsb/GEuq/eFdpuzSqeYTcfi6idkyugwfYwXFU1+5fZKUaRKYCwkkFQVfcAs1fXA5V+++FGfvjJ/CxURaSxaBvGdGDhfXE28LWuT9ozCl5xw4Yq5OGazvV24mZVSoOO0yZ31j7kYvtwYK6NeADwbSxDdJEqO4k//0zOHKrUiGYXtqw/A0LFFtqoZKFjnkCAQOjgdkwgdYwHQYDVR0OBBYEFMd9jMIhF1Ylmn/Tgt9r45jk14alMIGmBgNVHSMEgZ4wgZuAFMd9jMIhF1Ylmn/Tgt9r45jk14aloXikdjB0MQswCQYDVQQGEwJVUzETMBEGA1UECBMKQ2FsaWZvcm5pYTEWMBQGA1UEBxMNTW91bnRhaW4gVmlldzEUMBIGA1UEChMLR29vZ2xlIEluYy4xEDAOBgNVBAsTB0FuZHJvaWQxEDAOBgNVBAMTB0FuZHJvaWSCCQDC4IdGZEowjTAMBgNVHRMEBTADAQH/MA0GCSqGSIb3DQEBBAUAA4IBAQBt0lLO74UwLDYKqs6Tm8/yzKkEu116FmH4rkaymUIE0P9KaMftGlMexFlaYjzmB2OxZyl6euNXEsQH8gjwyxCUKRJNexBiGcCEyj6z+a1fuHHvkiaai+KL8W1EyNmgjmyy8AW7P+LLlkR+ho5zEHatRbM/YAnqGcFh5iZBqpknHf1SKMXFh4dd239FJ1jWYfbMDMy3NS5CTMQ2XFI1MvcyUTdZPErjQfTbQe3aDQsQcafEQPD+nqActifKZ0Np0IS9L9kR/wbNvyz6ENwPiTrjV2KRkEjH78ZMcUQXg0L3BYHJ3lc69Vs5Ddf9uUGGMYldX3WfMBEmh/9iFBDAaTCK
</item>
</string-array>
</resources>
How did I got this values ? From a newly Android native project using custom fonts. The certificate are always the same so no worries in copy pasting.
Up until now, we have defined a downloadable font and the necessary certificates. But Android still does not know how to automatically download the font. To achieve this a little more work is necessary.
Resouces/values
folder, create a new preloaded_fonts.xml
file.<?xml version="1.0" encoding="utf-8"?>
<resources>
<array name="preloaded_fonts" translatable="false">
<item>@font/modak</item>
</array>
</resources>
application
element
<meta-data
android:name="preloaded_fonts"
android:resource="@array/preloaded_fonts" />
Do not forget to add your other downloadable fonts inside preloaded_fonts.xml
if any !
Using custom fonts in XML requires a bit of initial work. But once done, it is easier than ever. Beside removing the need of writing code, it allows defining fonts inside styles. You can then inherit from those take and enjoy having the fonts defined only once in the application.
Downloadable fonts removes the need to include each and every fonts you need to use. By sharing fonts with all the others applications on the users device, as well as excluding fonts from each application updates, downloadable fonts saves your users bandwidth and storage. So be a good developer and use them if you can !
As always, please feel free to read my previous posts and to comment below, I will be more than happy to answer.
]]>There are various excellent commercial solutions for that like Camtasia Studio which offers amazing recording and editing features. As much as I like this tool and can only recommend it, there are times you just need as free solution for recording and leave editing aside.
This post assumes that you are demoing an application running on an physical iPhone and a physical Android device and that you are using a MacOS computer to project and record your demonstration.
If you are on Windows or Mac just demoing an Android phone, most of the content of this post still applies, just skip the iOS part.
If you are on Windows and want to display and record your iPhone application, there are no free solutions in my knowledge to do that. Feel free to update me in the comments below if you know any.
MacOS has a built-in but hidden way to allow you to record your computer screen : Quicktime. It can also be used to display the iPhone connected to your computer. The problem is that it cannot do both at the same time. So we will use it to display the iPhone.
After opening Quicktime, in the menu, select the New Movie Recording
option as in the screenshot below.
Then, changing the video source by choosing the device’s name is needed as shown below.
There are various pieces of software that can be used again here. Most of them are paid or free with advertisements like Vysor. There is a completely free and opensource alternative however : scrpcpy.
Instructions on how to install it or how to use it can be found there : https://github.com/Genymobile/scrcpy.
Once it is done, displaying an Android phone on screen is as easy as plugin the phone to the computer and running the following command.
scrcpy
To record the screen we will use the Open Broadcaster Software https://obsproject.com/.
At the time I am writing these lines there are still some minor tweaks needed to make OBS function correctly on MacOS Catalina. More informations here : https://obsproject.com/forum/threads/macos-10-15-catalina-support-status.111343/
When you launch OBS for the first time on a machine the auto-configuration wizard is displayed. If you are new to OBS you might want to follow the wizard according to the screenshots below.
Optimize for recording :
Set the canvas resolution do 1920x1280 :
Wait for the process check if the configuration chosen is possible with your current hardware :
Displaying a summary of the configuration applied by the wizard :
OBS has the concept of a scene. This is link your working video canvas. You can add many video and audio input to one scene. You can also configure several scenes at switch between them applying the kind of effects seen during live streaming videos.
When you first launch OBS, the scene by default is your current monitor. Which gives something recursive like the following picture.
On MacOS, the display seems to be only recording a quarter of the screen. Nothing to worry, we just need to center and fit the screen in the scene by right clicking on the Display Capture and selecting Fit screen under the Transform menu.
Before pushing the Start Recording button on the bottom right of the OBS interface we need to check the recording settings.
We can tune these by opening the OBS settings :
In the output section check the output path and the recording format.
By default the mkv file format is selected. It has many advantages but needs to be transformed after capture to edit or publish it. In my settings, since I will edit the videos after with Camtasia Studio, I choose mp4.
If recording your screen is actually enough for you, you can actually stop reading this post. Just display your iPhone and your Android devices and push the Start Recording button on the bottom right of the OBS interface and retrieve the record in the folder you have chosen.
Still there ?
…
Yes ?
…
Let’s go a bit further !
Instead of recording the whole screen we will only configure one scene with the iPhone on the left, the Android on the right an and on the middle a webcam of you presenting to makes things a bit more lively.
Have you read the steps above before looking at these images ?
Do not forget to repeat the process for the other device.
Capturing a webcam is the same process as before but instead of selecting the Window Capture option select the Video Capture Device, give it a name and choose your webcam in the list.
You can move your sources around, scale them like in any photo/video editing software. You can also access more features by right clicking on each source like for centering the webcam source here.
And once you are happy with the results like I was you can start recording !
Recording a demo is not something very simple, beyond just the software you need the right hardware like a proper microphone, a room without noise etc…
After recording you will often need some sound processing (noise and glitch removal) or video editing and so one.
OBS Studio have far more capabilities than what demonstrated here, especially live streamings. I hope that by reading this post you got a glance of what is possible with it.
If you liked this subscribe to the channel and do not forget to ring that bell to receive notifications for… oops sorry, this is not Youtube.
As always, please feel free to read my previous posts and to comment below, I will be more than happy to answer.
]]>