In the previous post, we sent notifications to all of our users using Azure Mobile Center REST APIs.
This time we will go through create and using audiences to send push notifications to user segments.
Audiences
Audiences allow us to categorise our user base. The available parameters are the following:
- Application version
- Country
- Carrier
- Language
- Device model
- OEM
- OS version or API version
- Screen size
It’s also possible to add our own parameters by using custom properties.
For more information about this you can look at the official documentation over there: https://docs.microsoft.com/en-us/appcenter/push/send-notification#audiences
Standard audience
Creating an audience
Creating an audience is done by using the PUT method on:
https://api.mobile.azure.com/v0.1/apps/[user]/[app]/analytics/audiences/[audiencename]
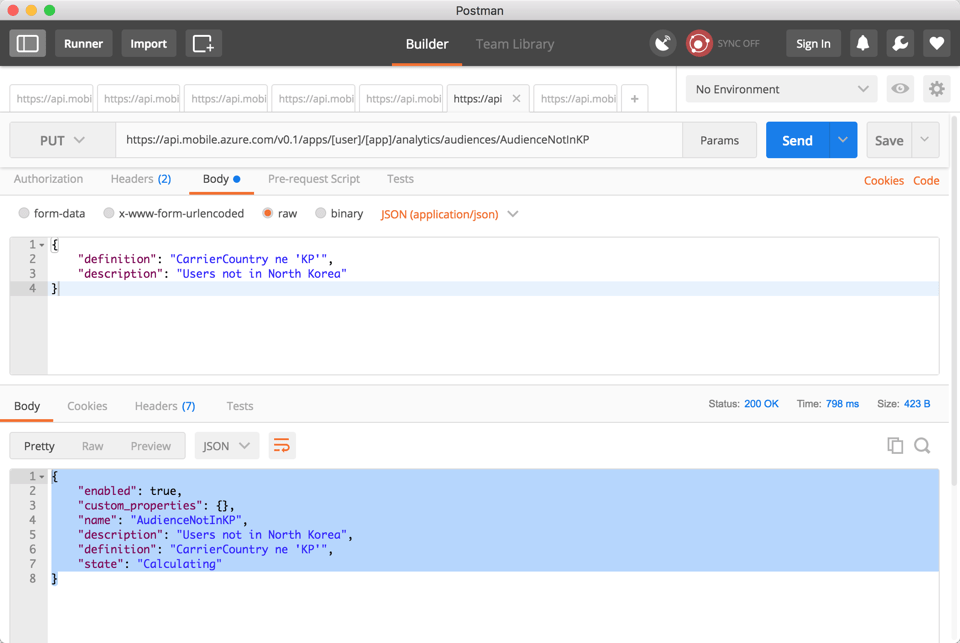
Let’s take an example and create an audience for all of our users that are not in North Korea.
Since countries identifiers’ used by the API seem to follow the ISO 3166-1 alpha 2 we will name this audience AudienceNotInKP.
We then call the API using a PUT method:
https://api.mobile.azure.com/v0.1/apps/[user]/[app]/analytics/audiences/AudienceNotInKP
This request payload will be a json, therefore we need to add the right HTTP header:
Content-Type: application/json
Let’s now write the payload inside the request’s body :
{
  "definition": "CarrierCountry ne 'KP'",
  "description": "Users not in North Korea"
}

Standard properties
You might have realised that definition field is defined using ODATA. Therefore, ne means not equals and eq means equals. The list of all available fields is not clearly written inside the documentation but I tried to list it for you in the same order as previously :
- AppVersion
- CarrierCountry
- CarrierName
- Language
- Model
- OemName
- OsVersion
- ScreenSize
Custom audience
Creating the audience
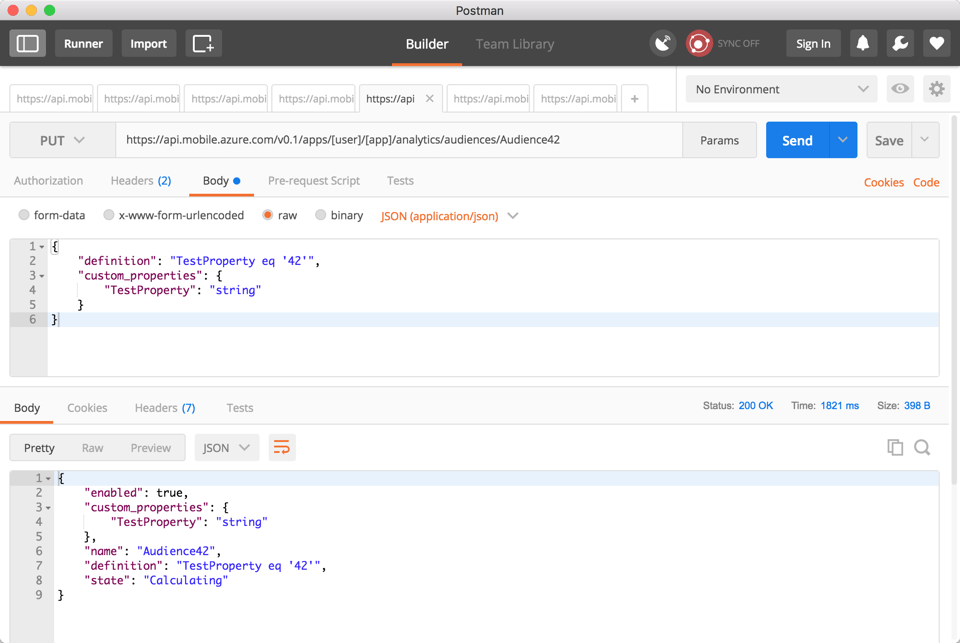
The creation of custom audiences is based on custom properties added by the application. We will add a custom audience that will match the custom property TestProperty with the value 42.
We follow the same steps as previously but with the following endpoint:
https://api.mobile.azure.com/v0.1/apps/[user]/[app]/analytics/audiences/Audience42
{
  "definition": "TestProperty eq '42'",
  "custom_properties": {
    "TestProperty": "string"
  }
}
The new audience is now created.

The mobile application
Adding a custom property in the mobile application is pretty simple and is done like this:
var cp = new CustomProperties();
cp.Set("TestProperty", "42");
MobileCenter.SetCustomProperties(cp);
You will find more examples in the official documentation:
https://docs.microsoft.com/en-us/mobile-center/sdk/other-apis/xamarin.
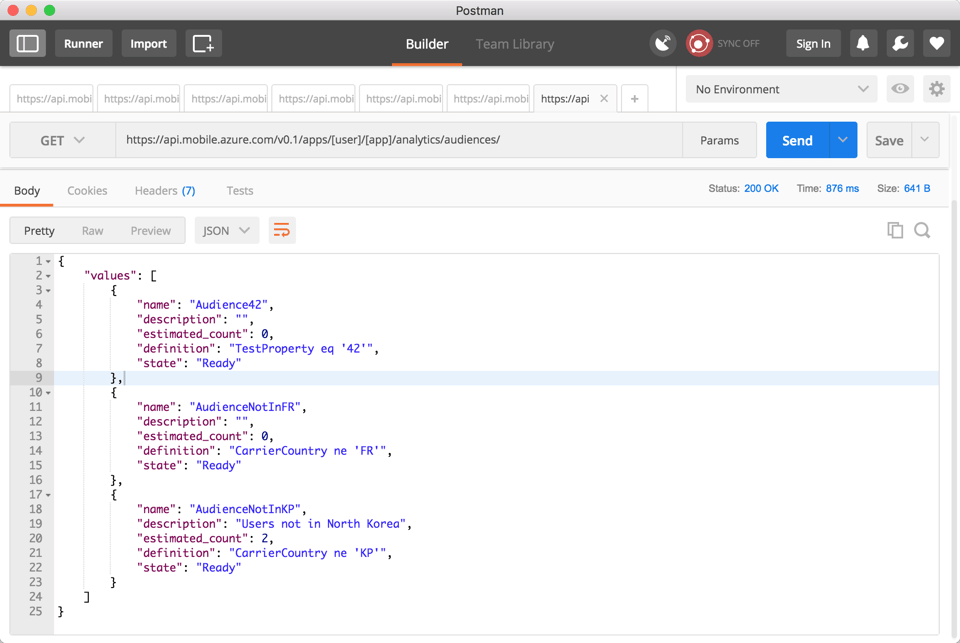
Audience listing
To get a list of all the audiences we just need to call the following endpoint with a GET method:
https://api.mobile.azure.com/v0.1/apps/[user]/[app]/analytics/audiences/

Notify an audience
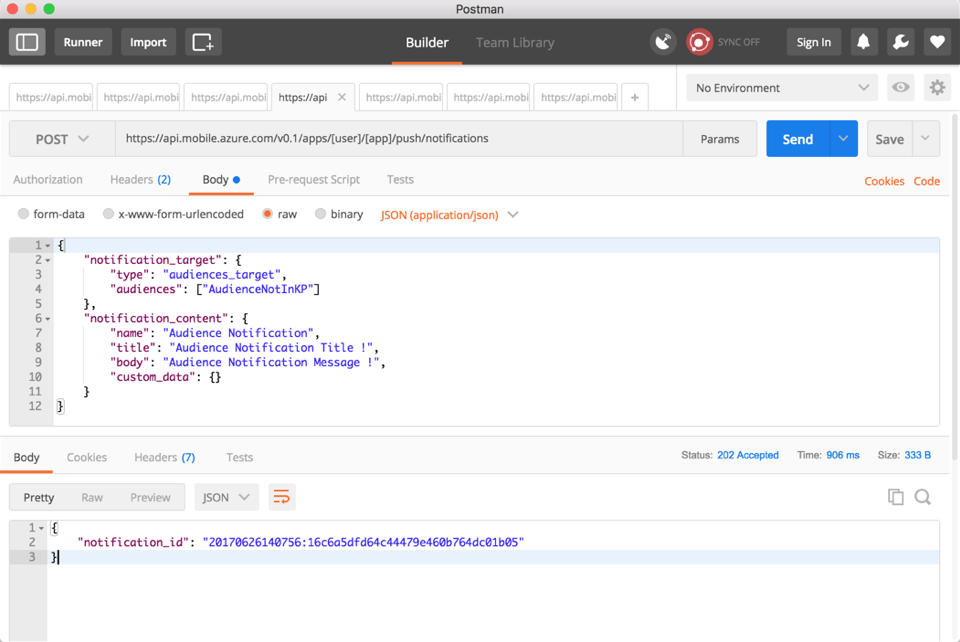
Now that everything is set up, we just need to push a notification by make a POST request on the following endpoint:
https://api.mobile.azure.com/v0.1/apps/[user]/[app]/push/notifications.
Since our push payload is a JSON, let’s add the correct HTTP header:
Content-Type: application/json
Here’s our HTTP request’s body:
{
  "notification_target": {
    "type": "audiences_target",
    "audiences": ["AudienceNotInKP"]
  },
  "notification_content": {
    "name": "Audience Notification",
    "title": "Audience Notification Title !",
    "body": "Audience Notification Message !",
    "custom_data": {}
  }
}
We can see the audiences are added inside a JSON array, so it’s possible to add more than one !

Conclusion
In this post we saw how to send a push notification to an audience by using Azure Mobile Center REST APIs.
Since it is so easy to dynamically create push notifications using REST APIs, some scenarios become available. For example, we may add the user identifier as a custom property and be able to push a notification to all of this user’s devices without having to explicitly handle his device list.


Comments