
Warning : This page has been marked as an archive because the author consider that its content is no longer relevant.
Lorsque l’on créer une fenêtre en WPF. Elle apparait par défaut avec les décorations standard de Windows.
On trouve maintenant de plus en plus d’applications qui s’affranchissent de cette bordure, tout particulièrement celles qui utilisent le “thème” Metro (par exemple MetroTwit).
Cet article a pour but de vous montrer comment créer une fenêtre personnalisée (chrome-less windows).
Le code que je vais vous présenter est très fortement inspiré de celui de l’exemple de client Netflix en WPF présente dans les pages de démonstration du framework nRoute.
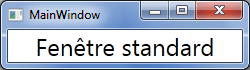
Commençons avec la fenêtre standard ci-dessus dont le code est le suivant :
<Window x:Class="WpfApplication1.MainWindow"
        xmlns="http://schemas.microsoft.com/winfx/2006/xaml/presentation"
        xmlns:x="http://schemas.microsoft.com/winfx/2006/xaml"
        Title="MainWindow" Height="70" Width="250">
    <Grid>
        <TextBlock FontSize="24" Text="Fenêtre standard" HorizontalAlignment="Center" />
    </Grid>
</Window>
namespace WpfApplication1
{
    public partial class MainWindow
     {
        public MainWindow()
        {
            InitializeComponent();
        }
    }
}
Maintenant modifions la déclaration de la fenêtre afin que le code ressemble à celui-ci :
<Window x:Class="WpfApplication1.MainWindow"
         xmlns="http://schemas.microsoft.com/winfx/2006/xaml/presentation"
         xmlns:x="http://schemas.microsoft.com/winfx/2006/xaml"
         Title="MainWindow" Height="70" Width="250"
         AllowsTransparency="True" WindowStyle="None">
La combinaisons des attributs AllowsTransparency et WindowStyle respectivement à True et None permet de se débarrasser des boutons de réduction, d’agrandissement et de fermeture par défaut de windows et de la bordure entourant la fenêtre. Tout cela est très bien mais il va quand même falloir mettre nos propres boutons si l’on veux que l’utilisateur garde une bonne expérience de notre application.
Nous allons rajouter trois boutons qui ferons office de remplaçant aux boutons standards :
<Window x:Class="WpfApplication1.MainWindow"
         xmlns="http://schemas.microsoft.com/winfx/2006/xaml/presentation"
         xmlns:x="http://schemas.microsoft.com/winfx/2006/xaml"
         Title="MainWindow" Height="180" Width="350"
         AllowsTransparency="True" WindowStyle="None">
    <Grid>
        <Grid.ColumnDefinitions>
            <ColumnDefinition Width="110*" />
            <ColumnDefinition Width="68*" />
            <ColumnDefinition Width="67*" />
            <ColumnDefinition Width="65*" />
        </Grid.ColumnDefinitions>
        <Grid.RowDefinitions>
            <RowDefinition Height="40" />
            <RowDefinition Height="69*" />
        </Grid.RowDefinitions>
        <TextBlock FontSize="24" Text="Fenêtre custom" Width="190"
                   Grid.Row="1"  Grid.ColumnSpan="4"
                   HorizontalAlignment="Center" VerticalAlignment="Center" />
        <Button Content="_" Grid.Column="1" Click="MinimizeButton_Click" />
        <Button Content="[]" Grid.Column="2" Click="RestoreButton_Click" />
        <Button Content="+" Grid.Column="3" Click="CloseButton_Click" />
    </Grid>
</Window>
Le code précédent nous donne le résultat suivant :
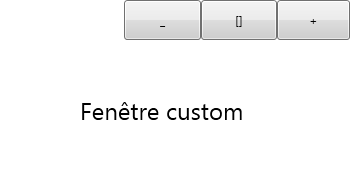
Ecrivons le code associés aux clics des différents boutons :
private void MinimizeButton_Click(object sender, RoutedEventArgs e)
{
    WindowState = WindowState.Minimized;
}

private void RestoreButton_Click(object sender, RoutedEventArgs e)
{
    WindowState = WindowState == WindowState.Normal ? WindowState.Maximized : WindowState Normal;
}

private void CloseButton_Click(object sender, RoutedEventArgs e)
{
    Close();
}
Nous avons maintenant des boutons fonctionnels cependant il nous manque toujours la possibilité de déplacer la fenêtre à la souris. Pour cela nous allons créer une zone “sensible” dans la partie haute de la fenêtre. Retournons dans notre XAML et modifions-le.
<Window x:Class="WpfApplication1.MainWindow"
         xmlns="http://schemas.microsoft.com/winfx/2006/xaml/presentation"
         xmlns:x="http://schemas.microsoft.com/winfx/2006/xaml"
         Title="MainWindow" Height="180" Width="350"
         AllowsTransparency="True" WindowStyle="None">
    <Grid>
        <Grid.ColumnDefinitions>
            <ColumnDefinition Width="*" />
            <ColumnDefinition Width="25" />
            <ColumnDefinition Width="25" />
            <ColumnDefinition Width="25" />
        </Grid.ColumnDefinitions>
        <Grid.RowDefinitions>
            <RowDefinition Height="25" />
            <RowDefinition Height="*" />
        </Grid.RowDefinitions>
        <Rectangle Fill="Gray" Grid.Row="0" Grid.ColumnSpan="4" />
        <TextBlock FontSize="24" Text="Fenêtre custom" HorizontalAlignment="Center" VerticalAlignment="Center" Grid.Row="1" Width="190" Grid.ColumnSpan="4" />
        <Button Content="_" Grid.Column="1" Click="MinimizeButton_Click" />
        <Button Content="[]" Grid.Column="2" Click="RestoreButton_Click" />
        <Button Content="+" Grid.Column="3" Click="CloseButton_Click" />
    </Grid>
</Window>
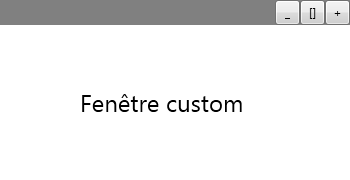
La zone sensible est donc représentée par le rectangle gris visible dans la capture ci-dessous :
Dans le code-behind ajoutons maintenant l’event handler suivant pour avoir la possibilité de déplacer notre fenêtre :
private void Header_Drag(object sender, MouseButtonEventArgs e)
{
    if (Mouse.LeftButton == MouseButtonState.Pressed)
        DragMove();
}
En brodant un peu nous pouvons même ajouter la gestion du double-clic pour maximiser la fenêtre.
private DateTime _headerLastClick = DateTime.MinValue;
private readonly static TimeSpan DoubleClickSpan = TimeSpan.FromMilliseconds(500);
private void Header_Drag(object sender, MouseButtonEventArgs  e)
{
    if (DateTime.Now.Subtract(_headerLastClick) <= DoubleClickSpan)
        WindowState = WindowState == WindowState.Normal ? WindowState.Maximized : WindowState.Normal;
    _headerLastClick = DateTime.Now;

    if (Mouse.LeftButton == MouseButtonState.Pressed)
        DragMove();
}
Le comportement de notre fenêtre personnalisée s’approche de plus en plus du comportement normal. Cependant ceux qui auraient tenté de maximiser la taille de la fenêtre dans les exemples précédents auront remarqués que cela ressemble plus à un passage en plein-écran qu’autre chose. Pour les autres maintenant vous le savez. Corriger ce petit problème demande d’utiliser un peu (beaucoup ?) d’interop.
Puis nous allons créer un fichier qui contiendra les définitions des structures utilisées pour le marshalling :
[StructLayout(LayoutKind.Sequential)]
public struct POINT
{
    public int  x;
    public int  y;

    public POINT(int x, int y)
    {
        this.x = x;
        this.y = y;
    }
}

[StructLayout(LayoutKind.Sequential)]
public struct MINMAXINFO
{
    public POINT ptReserved;
    public POINT ptMaxSize;
    public POINT ptMaxPosition;
    public POINT ptMinTrackSize;
    public POINT ptMaxTrackSize;
};

[StructLayout(LayoutKind.Sequential, CharSet = CharSet.Auto)]
public class MONITORINFO
{
    public int cbSize = Marshal.SizeOf(typeof(MONITORINFO));
    public RECT rcMonitor;
    public RECT rcWork;
    public int dwFlags;
}

[StructLayout(LayoutKind.Sequential, Pack = 0)]
public struct RECT
{
    public int left;
    public int top;
    public int right;
    public int bottom;

    public static readonly RECT Empty;
    public int Width
    {
        get  { return Math.Abs(right - left); }
    }

    public int Height
    {
        get { return  bottom - top; }
    }

    public RECT(int left, int top, int right, int bottom)
    {
        this.left = left;
        this.top = top;
        this.right = right;
        this.bottom = bottom;
    }

    public  RECT(RECT  rcSrc)
    {
        left = rcSrc.left;
        top = rcSrc.top;
        right = rcSrc.right;
        bottom = rcSrc.bottom;
    }

    public bool IsEmpty
    {
        get
        {
            return left >= right || top >= bottom;
        }
    }

    /// <summary>Return a user friendly representation of this struct</summary>
    public override string ToString()
    {
        return this == Empty ? "RECT {Empty}" :
            string.Format(
            "RECT { left : {0} / top : {1} / right : {2} / bottom : {3} }",
            left, top, right, bottom);
    }

    /// <summary>Determine if 2 RECT are equal (deep compare)</summary>
    public override bool Equals(object obj)
    {
        if (!(obj is RECT))
            return false;

        return this == (RECT)obj;
    }

    /// <summary>Return the HashCode for this struct (not garanteed to be unique)</summary>
    public override int GetHashCode()
    {
        return left.GetHashCode() + top.GetHashCode() +
            right.GetHashCode() + bottom.GetHashCode();
    }

    /// <summary>Determine if 2 RECT are equal (deep compare)</summary>
    public static bool operator ==(RECT rect1, RECT rect2)
    {
        return rect1.left == rect2.left && rect1.top == rect2.top
            && rect1.right == rect2.right && rect1.bottom == rect2.bottom;
    }

    /// <summary>Determine if 2 RECT are different(deep compare)</summary>
    public static bool operator !=(RECT rect1, RECT rect2)
    {
        return !(rect1 == rect2);
    }
}
Dans le code-behind de notre fenêtre nous ajoutons le code suivant :
protected override void OnSourceInitialized(EventArgs  e)
{
    base.OnSourceInitialized(e);

    _hwndSource = PresentationSource.FromVisual(this ) as HwndSource;
    if (_hwndSource != null)
    {
        IntPtr handle = _hwndSource.Handle;
        HwndSource source = HwndSource.FromHwnd(handle);
        if (source != null)
            source.AddHook(WindowProc);
    }
}

[DllImport ("user32")]
internal static extern bool GetMonitorInfo(IntPtr hMonitor, MONITORINFO lpmi);

[DllImport ("User32")]
internal static extern IntPtr MonitorFromWindow(IntPtr handle, int flags);

private static IntPtr WindowProc(IntPtr hwnd, int msg, IntPtr wParam, IntPtr lParam, ref bool handled)
{
    switch (msg)
    {
        case 0x0024:
            WmGetMinMaxInfo(hwnd, lParam);
            handled = true;
            break;
    }

    return (IntPtr)0;
}

private static void WmGetMinMaxInfo(IntPtr hwnd, IntPtr lParam)
{
    var mmi = (MINMAXINFO)Marshal.PtrToStructure(lParam, typeof(MINMAXINFO));

    // Adjust the maximized size and position to fit the work area of the correct monitor
    const int  monitorDefaulttonearest = 0x00000002;
    IntPtr  monitor = MonitorFromWindow(hwnd, monitorDefaulttonearest);

    if (monitor != IntPtr.Zero)
    {
        var monitorInfo = new  MONITORINFO();
        GetMonitorInfo(monitor, monitorInfo);
        RECT rcWorkArea = monitorInfo.rcWork;
        RECT rcMonitorArea = monitorInfo.rcMonitor;
        mmi.ptMaxPosition.x = Math.Abs(rcWorkArea.left - rcMonitorArea.left);
        mmi.ptMaxPosition.y = Math.Abs(rcWorkArea.top - rcMonitorArea.top);
        mmi.ptMaxSize.x = Math.Abs(rcWorkArea.right - rcWorkArea.left);
        mmi.ptMaxSize.y = Math.Abs(rcWorkArea.bottom - rcWorkArea.top);
    }

    Marshal.StructureToPtr(mmi, lParam, true);
}
Notre fenêtre dispose maintenant des comportements de base. Il ne nous reste qu’a gérer le redimensionnement de celle-ci avec la souris (et non plus seulement une alternance entre taille normale et maximisé) que je vous expliquerai dans un prochain article.
Comments