
Warning : This page has been marked as an archive because the author consider that its content is no longer relevant.
Before starting
If you have never heard about nRoute I invite you to read my previous article.
Downloading nRoute
If not already done go and downloand nRoute framework (version 0.4.5 when I’m writing these lines).
You can download it here : http://nroute.codeplex.com/releases/view/44449
Create the project and add the references
In this article I will present the different ways to use nRoute for the three platforms it is built for. So first create a Silverlight, WPF or WP7 project.
We can now add a reference to nRoute and to System.Windows.Interactivity (used for behaviors, triggers, etc…).
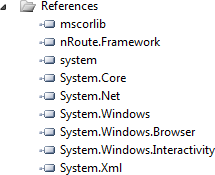
The screenshot above shows how the reference virtual folder should look like after the references have been added to you project.
Setting up nRoute
In order to be able to use nRoute we have to initialize it before. Let’s modify the App.xaml file first.
Setting up nRoute is different for each Silverlight, WPF and WP7. Here’s how to do for each platform.
The namespace used for nRoute is :
xmlns:n="http://nRoute/schemas/2010/xaml"
It will be used for all examples except those for WP7 because it is not available for this platform.
Silverlight
Add nRoute’s application service to the ServiceLifetimeObjects property of our application.
<Application xmlns="http://schemas.microsoft.com/winfx/2006/xaml/presentation"
             xmlns:x="http://schemas.microsoft.com/winfx/2006/xaml"
             xmlns:n="http://nRoute/schemas/2010/xaml"
             x:Class="nRoute_MVVM_Basics.App">
    <Application.ApplicationLifetimeObjects>
        <n:nRouteApplicationService />
    </Application.ApplicationLifetimeObjects>
</Application>
Windows Phone 7
The same as Silverlight here except for the namespace.
<Application
    x:Class="nRoute_MVVM_Basics_Phone.App"
    xmlns="http://schemas.microsoft.com/winfx/2006/xaml/presentation"
    xmlns:x="http://schemas.microsoft.com/winfx/2006/xaml"
    xmlns:shell="clr-namespace:Microsoft.Phone.Shell;assembly=Microsoft.Phone"
    xmlns:n="clr-namespace:nRoute.ApplicationServices;assembly=nRoute.Framework">

    <Application.ApplicationLifetimeObjects>
        <n:nRouteApplicationService />

        <shell:PhoneApplicationService
            Launching="Application_Launching" Closing="Application_Closing"
            Activated="Application_Activated" Deactivated="Application_Deactivated"/>
    </Application.ApplicationLifetimeObjects>
</Application>
WPF
The ApplicationLifetimeObjects property doesn’t exists in WPF therefore we have to do something special here. We have to make our Application inherits from nRoute.ApplicationServices.Application
First XAML
<n:Application x:Class="nRoute_MVVM_Basics_WPF.App"
             xmlns="http://schemas.microsoft.com/winfx/2006/xaml/presentation"
             xmlns:x="http://schemas.microsoft.com/winfx/2006/xaml"
             xmlns:n="http://nRoute/schemas/2010/xaml"
             StartupUri="MainWindow.xaml">
    <n:Application.ApplicationLifetimeObjects>
        <n:nRouteApplicationService />
    </n:Application.ApplicationLifetimeObjects>
</n:Application>
Then the code-behind
namespace nRoute_MVVM_Basics_WPF
{
    public partial class App : nRoute.ApplicationServices.Application
    {
    }
}
Creating the view
The view we will use here is over simple and will be the same on the three platforms.
<Grid x:Name="LayoutRoot">
    <TextBlock Text="{Binding Date}" />
</Grid>
Creating the ViewModel
nRoute provides a base class for ViewModels that implements the INotifyPropertyChanged interface and provides the NotifyPropertyChanged method taking a lambda parameter instead of a string.
I really appreciate this approach as it helps avoiding a lot of errors when refactoring the classes.
The secondary effect of this is that has a heavy performance cost. I invite you to read this post if you are interested in the performance issues with the different INotifyPropertyChanged implementations :
The following link passed away - RIP http://www.pochet.net/blog/2010/06/25/inotifypropertychanged-implementations-an-overview/
Using this base class is not required for nRoute. You can choose what implementations fits the best your needs or your tastes.
Here is our ViewModel (note the lamba call within NotifyPropertyChanged).
public class MainWindowViewModel : ViewModelBase
{
    private DateTime? _date;

    public DateTime? Date
    {
        get
        {
            return _date;
        }

        set
        {
            if (_date != value)
            {
                _date = value;
                NotifyPropertyChanged(() => Date);
            }
        }
    }

    public MainWindowViewModel()
    {
        Date = DateTime.UtcNow;
    }
}
Associating the ViewModel and the View
Now that we have a view and a view-model we need to associate them. This is done with attributes (like many things in nRoute).
There is two ways to do that :
Association from the ViewModel with MapViewModel attribute.
[MapViewModel(typeof(MyView))]
public class MyViewViewModel : ViewModelBase
Association from the view’s code-behind with MapView attribute.
[MapView(typeof(MyViewViewModel))]
public partial class MyView
You can choose either way. I generally use MapViewModel for most of the cases.
These attributes allows nRoute to build a relationship between your views and view-models but they do not lead to the automatic injection of the view-model in the DataContext property of the View. This injection is done with a behavior.
We will now add the nRoute and System.Windows.Interactivity namespaces to our view and add the behavior.
Silverlight
<UserControl x:Class="nRoute_MVVM_Basics.MainPage"
    xmlns="http://schemas.microsoft.com/winfx/2006/xaml/presentation"
    xmlns:x="http://schemas.microsoft.com/winfx/2006/xaml"
    xmlns:i="clr-namespace:System.Windows.Interactivity;assembly=System.Windows.Interactivity"
    xmlns:n="http://nRoute/schemas/2010/xaml">

    <i:Interaction.Behaviors>
        <n:BridgeViewModelBehavior />
    </i:Interaction.Behaviors>

    <Grid x:Name="LayoutRoot">
        <TextBlock Text="{Binding Date}" />
    </Grid>
</UserControl>
WP7
<phone:PhoneApplicationPage
    x:Class="nRoute_MVVM_Basics_Phone.MainPage"
    xmlns="http://schemas.microsoft.com/winfx/2006/xaml/presentation"
    xmlns:x="http://schemas.microsoft.com/winfx/2006/xaml"
    xmlns:phone="clr-namespace:Microsoft.Phone.Controls;assembly=Microsoft.Phone"
    xmlns:shell="clr-namespace:Microsoft.Phone.Shell;assembly=Microsoft.Phone"
    xmlns:i="clr-namespace:System.Windows.Interactivity;assembly=System.Windows.Interactivity"
    xmlns:nBehaviors="clr-namespace:nRoute.Behaviors;assembly=nRoute.Framework"
    FontFamily="{StaticResource PhoneFontFamilyNormal}"
    FontSize="{StaticResource PhoneFontSizeNormal}"
    Foreground="{StaticResource PhoneForegroundBrush}"
    SupportedOrientations="Portrait"
    Orientation="Portrait"
    shell:SystemTray.IsVisible="True">

    <i:Interaction.Behaviors>
        <nBehaviors:BridgeViewModelBehavior />
    </i:Interaction.Behaviors>

    <Grid x:Name="LayoutRoot" Background="Transparent">
        <TextBlock Text="{Binding Date}" />
    </Grid>

</phone:PhoneApplicationPage>
WPF
<Window x:Class="nRoute_MVVM_Basics_WPF.MainWindow"
        xmlns="http://schemas.microsoft.com/winfx/2006/xaml/presentation"
        xmlns:x="http://schemas.microsoft.com/winfx/2006/xaml"
        xmlns:i="clr-namespace:System.Windows.Interactivity;assembly=System.Windows.Interactivity"
        xmlns:n="http://nRoute/schemas/2010/xaml"
        Title="MainWindow" Height="350" Width="525">
    <i:Interaction.Behaviors>
        <n:BridgeViewModelBehavior />
    </i:Interaction.Behaviors>

    <Grid x:Name="LayoutRoot" Background="White">
        <TextBlock Text="{Binding Date}" />
    </Grid>
</Window>
Some details
When nRoute is initialized, it will override the default behavior of Silverlight, WPF or WP7 mainly thanks to the Resource Locator Framework (aka RLF). When BridgeViewModelBehavior is attached to an object, it uses the RLF in order to find a view-model corresponding the current object thanks to the MapViewModel and/or MapView attributes.
So here is the glue. This is this behavior combined with the RLF that allows the externalization of the view-model’s creation.
Conclusion
You now how to intialize nRoute for Silverlight, WPF and WP7 and how to associate a view-model to your view with the BridgeViewModelBehavior.
You have seen the ViewModelBase class with its benefits and drawbacks.
In the next article I’ll show you how to create commands and revers commands with nRoute.
As usual you’ll see a sample on my skydrive.
Comments